


Оценок - 4, средний балл: 4.5
(

 )
)
|
Фото и характеристики Brother X-5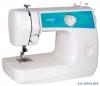 |


Фрагмент инструкции
Fibra larga de poliéster PRENDAS DE PUNTO Prendas de punto simple, Prendas de punto doble, Jersey, Tricot n° 90/14 (Punta de bola) Poliéster envuelto de algodón Fibra larga de poliéster NOTA: 1.Elija la aguja y el hilo correctos en la tabla arriba. 2. Utilice el mismo tamaño de hilo para los hilos superior (carrete) e inferior (canilla). ТАБЛИЦА РЕКОМЕНДУЕМЫХ КОМБИНАЦИЙ ТКАНЕЙ, ИГЛ И НИТЕЙ ТКАНИ РАЗМЕР ИГЛЫ ПАРАМЕТРЫ НИТИ ОЧЕНЬТОНКИЕ Тонкий трикотаж, кружево, тонкий лён, шёлк, органза, шифон #65/9 Хлопок: 80 Синтетика/длинноволоконный полиэстер Тонкий мерсеризованный хлопок ЛЁГКИЕ Вуаль, тафта, синтетика, шёлк, батист #75/11 Хлопок: 60-80Шелк: «А» Синтетика/длинноволоконный полиэстер Мерсеризованная 50 СРЕДНИЕ Хлопок, миткаль, поплин, перкаль, пике, атлас, вельвет, тонкая шерсть, тонкий вельвет, костюмная ткань, лён, муслин #90/14 (Входит в комплект Вашей машины.) Хлопок: 50-60 Шелк: «А» Синтетика/длинноволоконный полиэстер Мерсеризованная 50-60 ТЯЖЕЛЫЕ Джинсовая ткань, габардин, твид, вельвет, брезент, парусина #100/16 Хлопок: 40-50 Мерсеризованная, высокой прочности Длинноволоконный полиэстер ТРИКОТАЖ Одинарный, двойной, джерси, трико #90/14 (Закруглённое остриё) Хлопок, армированный полиэстером Длинноволоконный полиэстер ПРИМЕЧАНИЕ: 1.Подбирайте соответствующие друг другу иглу и нить исходя из приведённой выше таблицы. 2.Верхняя нить (нить катушки) и нижняя нить (нить шпульки) должны быть одинакового размера. 23 Straight Stitching Point droit Pattern 6-10 (Center needle position) 11 (Left needle position) The Straight Stitch (6-10 or 11) is used for top stitching and sewing lightweight fabrics. Starting Sewing (fig. A) 1. Set the pattern selection dial to the appropriate Straight Stitch (6-10 or 11) with the desired length. 2. Raise the needle to its highest position and lift the presser foot lifter. 3. Pull up the bobbin thread by turning the balance wheel toward you (counterclockwise) and place both the upper and lower threads toward the back behind the presser foot. 4. Place the fabric under the presser foot and position the needle 1 cm (3/8") from the edge of the fabric. 5. Lower the presser foot. 6. To backtack, press the reverse sewing lever down as far as possible and lightly touch the foot controller. Sew 5 to 10 stitches in the reverse direction. 7. Release the reverse sewing lever and start sewing in the forward direction by applying pressure to the foot controller. NOTE: The backtack or reverse sewing is used for locking the end of seams and reinforcing stitches. Changing Sewing Direction (fig. B) 1. Stop the machine at the point where you wish to change directions with the needle still in the fabric. If the needle ends in the up position, turn the balance wheel toward you (counterclockwise) until the needle enters the fabric. 2. Raise the presser foot and turn the fabric to line up its new direction using the needle as a pivot point. 3. Lower the presser foot and start sewing in the new directio...
Эта инструкция также подходит к моделям:Швейные машинки - Innov-is 30 (1.27 mb)
Швейные машинки - JS-23 (1.27 mb)
Швейные машинки - LS-1520 (1.27 mb)
Швейные машинки - LS-2125 (1.27 mb)