

 )
)
|
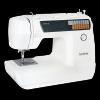
Фото и характеристики Brother Star 35 |
Фрагмент инструкции
Дальнейшее нажатие на педаль приводит соответственно к увеличению скорости. После прекращения воздействия на педаль машина останавливается. Необходимо следить за тем, чтобы на педаль контроллера не попал какой-либо посторонний предмет, когда машина не используется. © Ножной контроллер А ПРЕДОСТЕРЕЖЕНИЕ Не допускайте скопления на ножном контроллере кусочков ткани и пыли. Это может привести к возникновению пожара или поражению электрическим током. (Модели STAR 240E, STAR 230E) 1. Когда машина выключена, вставьте вилку ножного контроллера в гнездо для подсоединения ножного контроллера, расположенное на швейной машине. © Ножной контроллер 2 Гнездо для подсоединения ножного контроллера * Скорость, устанавливаемая с использованием контроллера скорости шитья - это максимальная скорость шитья ножным контроллером. * Во время использовании ножного контроллера кнопка пуска/ остановки машины не действует. ПРИМЕЧАНИЕ (Только для США): (Модели STAR 240E, STAR 230E) Ножной контроллер: Модель N5V Данный ножной контроллер предназначен для моделей STAR 240E, STAR 230E. (Модели PS-57, PS-55, STAR-50, RSR-55, XRX-55, PS-53) Ножной контроллер: Модель N Данный ножной контроллер предназначен для моделей PS-57, PS-55, STAR-50, RSR-55, XRX-55, PS-53. 10 KNOWING YOUR SEWING MACHINE KENNENLERNEN IHRER MASCHINE КРАТКОЕ ТЕХНИЧЕСКОЕ ОПИСАНИЕ МАШИНЫ KNOWING YOUR SEWING MACHINE KENNENLERNEN IHRER MASCHINE КРАТКОЕ ТЕХНИЧЕСКОЕ ОПИСАНИЕ МАШИНЫ Checking the Needle X С X с © The sewing needle must always be straight and sharp for smooth sewing. To Check the Needle Correctly: To check the needle, place the flat side of the needle on a flat surface. Check the needle from the top and the sides. Throw away any bent needles. © Parallel space © Level surface (bobbin cover, glass, etc.) * Place a level surface under the needle. Replacing the Needle ;-3 1®*==- L A CAUTION • Turn the main power switch to OFF before changing the needle. If the main power is left on and Start/Stop button is pressed or foot controller is stepped on, the machine will start and injury may result. • Use only sewing machine needles for home use. Other needles may bend or break and cause injury. • Never sew with a bent needle. A bent needle will easily break and cause injury. 1. Remove the power supply plug from the outlet. 2. Raise the needle bar to its highest position. 3. Lower the presser foot. 4. Remove the needle by loosening the needle clamp screw. © Presser foot lever CAUTION Do not loosen or tighten the needle clamp screw with a strong force, otherwise it may be damaged. 5. With the flat side of the needle facing the back, insert the new needle all the way to the top of the needle stopper (viewing window) in the needle clamp. Use a screwdriver to securely tighten the needle clamp screw. © Needle stopper © Hole for setting needle © Flat side of needle A CAUTION Be sure to push in the needle until it touches the stopper, and securely tighten the needle clamp screw with a screwdriver. If the needle is not completely inserted or the needle clamp screw is loose, the needle may break or the machine may be damaged. 11 Nadel prüfen Die Nähnadel muß für problemloses Nähen immer gerade und spitz sein. Richtiges Überprüfen der Nadel: Um die Nadel zu überprüfen, legen Sie sie mit der abgeflachten Seite auf eine plane Oberfläche. Überprüfen Sie die Nadel von oben und an allen Seiten. Verbogene Nadeln müssen entsorgt werden und dürfen keinesfalls verwendet werden. © Paralleler Abstand © Plane Oberfäche (Stichplatte, Glas, etc.) * Legen Sie die Nadel auf eine plane Oberfläche. 1. Ziehen Sie den Netzstecker aus der Steckdose. 2. Drehen Sie den Nadelhalter auf die höchste Pos...
Эта инструкция также подходит к моделям:Швейные машинки - Star 45 (7.95 mb)
Швейные машинки - Star 50 (7.95 mb)
Швейные машинки - Star 55 (7.95 mb)
Швейные машинки - Star 60 (7.95 mb)


