


Оценок - 4, средний балл: 3.3
(


 )
)
|
Фото и характеристики Canon Digital IXUS 950 IS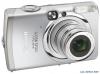 |


К этому устройству также есть другие инструкции:
Фрагмент инструкции
•Export an Image as Wallpaper: Exports the image as a wallpaper file. Organize Images: [File] menu, [Organize Image] •Sort Images: sorts images according to criteria such as the shooting date or Star Rating and saves them into a specified folder. •Rename: changes the files names of multiple images in a single pass. Convert RAW Images: [File] menu, [RAW image processing] Converts RAW images. You can adjust the image brightness, contrast and color balance among other attributes during conversion. Merge Panoramas: [Edit] menu, [PhotoStitch] Merges multiple images and creates a single large panoramic image (p. 66). Edit Movies: [Edit] menu, [Movie Edit] Edits movies or still images strung together. You can add titles or background music and apply various effects (p. 62). Extracting Stills from Movies: [Edit] menu, [Extract frames from a movie] Extracts still images from movies over a specified interval and saves them as image files. Macintosh Using the Software on the Macintosh Platform – Advanced Techniques Display Settings: [View] menu, [View Settings] Hides or shows image information beneath the thumbnail, such as the file name or the shooting date and time. Sort Images: [View] menu, [Sort] Arranges image order in the Browser Area according to criteria such as the filename, file modification date, file size or shooting date. Macintosh Using the Software on the Macintosh Platform – Advanced Techniques Replaying Movies 1 Double-click an image with a movie icon in ImageBrowser’s Browser Area. The movie will appear in the Viewer Window. Movie icon 2 Click the button. You can control the movie's playback and sound volume. You can save the displayed scene as a still image by clicking here. Macintosh Using the Software on the Macintosh Platform – Advanced Techniques Editing Movies You can create and edit movies: link movies and stills that have been downloaded to your computer, add background music, superimpose titles and other text, and apply various effects to the movies. 1 Select the image(s) to edit in ImageBrowser’s Browser Area (movies or stills). You can select multiple movies or stills. 2 Click the [Edit] menu and select [Movie Edit]. 3 Follow the steps displayed in the middle of the window to edit the movie and save it. Follow these steps to proceed. Instructions Click this button for detailed operational instructions. Click this button Storyboard Area Transition Effect Box to play the movie Displays thumbnails of the Appears between adjacent being edited. selected images. images and displays the Links images in order from symbols of the transition left to right. effects linking images. Macintosh Using the Software on the Macintosh Platform – Advanced Techniques Operating the Shutter Remotely (Remote Shooting) You can record still images by using a computer to control the shutter of a connected camera. This is particularly useful for checking images on the larger display of the computer as you record them and for high volume photography without worrying about filling the camera’s memory card. This function may not be available with certain camera models. Check your Camera User Guide to see if your model supports it. Preparing for Remote Shooting 1 Attach the supplied interface cable to the computer's USB port and the camera's DIGITAL terminal and place the camera in the correct mode for connecting. •Methods for connecting the camera to the computer and placing it in the correct mode for connecting vary between camera models. Please refer to the Camera User Guide. •If the Camera Control Window does not automatically appear, click the [CameraWindow] icon in the Dock (the bar at the bottom of the desktop). The Camera Control Window will display. 2 Open the lens cover or remove the lens cap on models equipped with them. Proceed to the next step if your model does not have one. 3 Click the [Remote shooting] tab. Macintosh 4 Click [Starts Remote Shooting]. 5 Select a destination for the captured images and click [Choose]. Using the Software on the Macintosh Platform – Advanced Techniques RemoteCapture Task Window The RemoteCapture Task window has the following features. Size and Resolution Selector Shows/Hides the Selects the size and resolution at which viewfinder or images are captured. detailed settings area. Rotation Settings Sets the rotation parameters for images after they are captured. You can add comments to images Release Button by placing a check Releases the mark here and shutter. typing text in the boxes below. Slide this to zoom the camera in or out. Viewfinder Display Start/Stop Viewfinder Click the [Start/Stop Button Viewfinder] button Starts or stops the while a connection to viewfinder display. the camera is open to display the image appearing in the Refresh Button camera’s viewfinder. Resets the exposure, focus and white balance. Set the camera shooting settings here. Macintosh The settings available in the RemoteCapture Task window vary between camera models. Using the Software on the Macinto...
Эта инструкция также подходит к моделям:Видеокамеры - PowerShot S5 IS (6.98 mb)
Видеокамеры - PowerShot A560 (6.98 mb)