


Оценок - 3, средний балл: 4.3
(

 )
)
|
Фото и характеристики Sony KDL-26L4000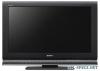 |


К этому устройству также есть другие инструкции:

Телевизоры - KDL-26L4000 (12.33 mb)
Телевизоры - KDL-26L4000 (20.8 mb)
Телевизоры - KDL-26L4000 (21.1 mb)
Фрагмент инструкции
Do not put stress on the LCD panel and the frame around the screen. • Be careful not to pinch your hands or the mains lead when you install the TV to the Table-Top Stand. 3 Use the supplied screws to attach the TV unit to the Table-Top Stand. Screws ~ • If an electric screw driver is used, set the torque to tighten at approximately 1.5 N·m {15 kgf·cm}. • Unless otherwise stated, illustrations here are for KDL32L40xx. 4 GB Connecting an aerial/ VCR/ DVD recorder with HDMI 3: Connecting an Start- up Guide aerial/VCR/ DVD recorder Coaxial cable Connecting an aerial only AV1 AV2 Connecting an aerial/ VCR/ DVD recorder with SCART Scart lead Coaxial cable Coaxial cable 1 2 HDMI cable Coaxial cable Coaxial cable VCR/ DVD recorder VCR/ DVD recorder ~ • AV1 outputs available only for analogue TV. • AV2 outputs to the current screen (except PC, HDMI1,2, Component 1080i). This product has been tested and found to compliant with the limits set out in the EMC Directive for using connection cables not longer than 3 meters (9.8 feet). Continued 5 GB 4: Preventing the TV 6: Selecting the from toppling over language, country/region KDL-32L40xx, KDL-26L40xx only and location 2 1 3 1 Install a wood screw (4 mm in diameter, not supplied) in the TV stand. 2 Install a machine screw (M6 . 12-14 mm, not supplied) into the screw hole of the TV. 3 Tie the wood screw and the machine screw with a strong cord. 5: Bundling the cables You can bundle the connecting cables as illustrated below. ~ Do not bundle the mains lead with other connecting cables. RETURN TOOLS AUDIO ANALOGDIGITAL GUIDE MENU 3,4,5 1 Connect the TV to your mains socket (220-240V AC, 50Hz). 2 Press 1 on the top edge of the TV. When you turn on the TV for the first time, the Language menu appears on the screen. ~ When you turn on the TV, the power indicator flashes in green. 3 Press F/f to select the language displayed on the menu screens, then press . Select: Confirm: Language Country Location English Nederlands Italiano Deutsch Auto Start-up 6 GB 4 Press F/f to select the country/region in which you will operate the TV, then press . Select:Back: Confirm: Language Country Location - United Kingdom Ireland Nederland Luxembourg France Italia Auto Start-up If the country/region which you want to use on the TV does not appear in the list, select “-” instead of a country/region. 5 Press F/f to select the location type in which you will operate the TV, then press . Language Country Location Home Shop Select:Back: Confirm: Auto Start-up This option selects the initial picture mode appropriate for the typical lighting condition in these environments. 7: Auto-tuning the TV 1 Before you start auto-tuning the TV, insert a pre-recorded tape into the VCR connected to the TV (page 5) and start play back. The video channel will be located and stored on the TV during auto-tuning. If no VCR is connected to the TV, skip this step. 2 Press . Back: Start: Do you want to start Auto Tuning? Auto Tuning The TV starts searching for all available digital channels, followed by all available analogue channels. This may take some time, so do not press any buttons on the TV or remote while proceeding. If a message appears for you to confirm the aerial connection No digital or analogue channels were found. Check all the aerial connections and press to start auto-tuning again. 3 When the Programme Sorting menu appears on the screen, follow the steps of “Programme Sorting” (page 27). If you do not change the order in which the analogue channels are stored on the TV, go to next step. 4 Press MENU to exit. The TV has now tuned in all the available channels. Detaching the Table- Top Stand from the TV ~ Do not remove the Table-Top Stand for any reason other than to wall-mount the TV. Table-Top Stand Start- up Guide 7 GB Transporting • Before transporting the TV set, disconnect all cables. Safety information • Two or more people are needed to transport a large TV Installation/Set-up Install and use the TV set in accordance with the instructions below in order to avoid any risk of fire, electrical shock or damage and/or injuries. Installation • The TV set should be installed near an easily accessible mains socket. • Place the TV set on a stable, level surface. • Only qualified service personnel should carry out wall installations. • For safety reasons, it is strongly recommended that you use Sony accessories, including: KDL-32L40xx: – Wall-mount bracket SU-WL500 KDL-26L40xx/KDL-19L40xx: – Wall-mount bracket SU-WL100 • Be sure to use the screws supplied with the Wall-mount bracket when attaching the mounting hooks to the TV set. The supplied screws are designed so that they are 8 mm to 12 mm in length when measured from the attaching surface of the mounting hook. The diameter and length of the screws differ depending on the Wall-mount bracket model. Use of screws other than those supplied may result in internal damage to the TV set or cause it to fall, etc. 8-12 mm Screw (supplied with the Wall-mount bracke...
Эта инструкция также подходит к моделям:Телевизоры - KDL-19L4000 (2.98 mb)
Телевизоры - KDL-32L4000 (2.98 mb)