


Оценок - 2, средний балл: 3.5
(


 )
)
|
Фото и характеристики Sony KDL-46X3000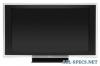 |


К этому устройству также есть другие инструкции:
Телевизоры - KDL-46X3000 (2.16 mb)
Телевизоры - KDL-46X3000 (5.36 mb)
Телевизоры - KDL-46X3000 (20.51 mb)
Телевизоры - KDL-46X3000 (20.63 mb)
Фрагмент инструкции
“Skip”: Skips an unnecessary input source. Auto S Video Selects the input signal from S video sockets 7 when / 7 sockets are both connected. Continued 37 GB Using Menu Functions AV2 Output Sets a signal to be output through the socket labelled / 2 on the rear of the TV. If you connect a VCR or other recording equipment to the / 2 socket, you can then record from the equipment connected to other sockets of the TV. “TV”: Outputs a broadcast. “AV1”: Outputs signals from equipment connected to the / 1 socket. “AV7”: Outputs signals from equipment connected to the / 7 socket. “Auto”: Outputs whatever is being viewed on the screen (except signals from the / 3, / 4, HDMI IN 5, HDMI IN 6, HDMI IN 8 and PC IN / sockets). HDMI Set-up This is used to set the HDMI control compatible equipment connected to the HDMI sockets. Note that the link setting must also be made on the side of the HDMI control compatible equipment that is connected. HDMI Control Sets whether or not to link the operations of the HDMI control compatible equipment and the TV. When set to “On”, the following menu items can be performed. Auto Devices Off When this is set to “On”, any connected HDMI control compatible equipment will be turned off with the TV. Auto TV On When this is set to “On”, and if the connected HDMI control compatible equipment is turned on, the TV automatically turns on, and then displays the HDMI input from the connected equipment. HDMI Device List Displays the connected HDMI control compatible equipment. ~ You cannot use “HDMI Control” if the TV operations are linked to the operations of an audio system that is compatible with HDMI control. Auto Start-up Starts the initial set-up to select the language and country/region, and tune in all available digital and analogue channels. Usually, you do not need to do this operation because the language and country/ region will have been selected and channels already tuned when the TV was first installed (page 6). However, this option allows you to repeat the process (e.g. to retune the TV after moving house, or to search for new channels that have been launched by broadcasters). Power Saving Selects the power saving mode to reduce the power consumption of the TV. When “Picture Off” is selected, the picture is switched off and the (Picture Off) indicator on the TV front panel lights up in green. The sound remains unchanged. Light Sensor “On”: Automatically optimises the picture settings according to the ambient light in the room. “Off”: Turns off the “Light Sensor” feature. ~ Be sure not to put anything over the sensor, as its function may be affected. See page 14 for further information on the sensor. Logo Illumination Lights up and turns off the Sony logo on the front of the TV. PC Power Management Switches the TV to standby mode if no signal is received for 30 seconds in the PC input. 38 GB Language Selects the language in which the menus are displayed. Product Information Displays your TV’s product information. All Reset Resets all settings to the factory settings and then displays the “Auto Start-up” screen. ~ • Be sure not to turn the TV off during this period (it takes about 30 seconds) or press any buttons. • All settings, including Digital Favourite list, country/region, language, auto tuned channels, etc. will be reset. 39 GB Using Menu Functions Analogue Set-up menu You can select the options listed below on the “Analogue Set-up” menu. To select options in “Settings”, refer to “Navigating through menus” (page 27). 1 Digit Direct When “1 Digit Direct” is set to “On”, you can select an analogue channel using one preset number button (0 – 9) on the remote. ~ When “1 Digit Direct” is set to “On”, you cannot select channel numbers 10 and above entering two digits using the remote. Auto Tuning Tunes in all the available analogue channels. This option allows you to retune the TV after moving house, or to search for new channels that have been launched by broadcasters. Programme Sorting Changes the order in which the analogue channels are stored on the TV. 1 Press F/f to select the channel you want to move to a new position, then press . 2 Press F/f to select the new position for your channel, then press . Programme Labels Assigns a channel name of your choice up to five letters or numbers. The name will be displayed briefly on the screen when the channel is selected. (Names for channels are usually taken automatically from Analogue Text (if available).) 1 Press F/f to select the channel you want to name, then press . 2 Press F/f to select the desired letter or number (“_” for a blank space), then press g. If you input a wrong character Press G/g to select the wrong character. Then, press F/f to select the correct character. To delete all the characters Select “Reset”, then press . 3 Repeat the procedure in step 2 until the name is completed. 4 Select “OK”, then press . 40 GB Manual Programme Preset Before selecting “Label”/“AFT”/“Audio Filter”/“Skip”/“Decoder”/“LNA”, press PROG +/– to...
Эта инструкция также подходит к моделям:Телевизоры - KDL-40X3000 (5.39 mb)
Телевизоры - KDL-40X3500 (5.39 mb)
Телевизоры - KDL-52X3500 (5.39 mb)
Телевизоры - KDL-70X3500 (5.39 mb)