


Оценок - 2, средний балл: 4
(

 )
)
|
Фото и характеристики Samsung SP-M220S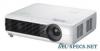 |


К этому устройству также есть другие инструкции:
Фрагмент инструкции
For best operating performance, replace the lamp according to the usage time. You can view the lamp usage time in the Information Display (INFO button). • Replace the lamp with the one specified below only. - Lamp Model Name : DPL3321U(SP-M200S, SP-M220S, SP-M250S) - For inquiries on lamp purchase, please see 'Contact SAMSUNG WORLDWIDE' in section 5-3. • Check that the power cord is unplugged before replacing the lamp. • Because the lamp is a high temperature and high voltage product, wait at least one hour from the time you disconnect the power cord before replacing the lamp. • The projector lamp is on the top of the projector. • Do not leave the old lamp near flammable items or in reach of children. There is a danger of fire, burns, or injury. • Remove dirt or foreign material around or inside the lamp unit using a proper vacuum device. • When handling the lamp, avoid touching any part of it except for the handles. If you handle the lamp incorrectly, you can shorten the lamp's lifetime and affect picture quality. • When you change the lamp, put the projector on a flat surface. • The projector has been designed so that the projector does not work if the lamp cover is not completely assembled after a lamp replacement. If the projector does not work properly, please check the operating status of the indicator LED. Lamp contains Mercury. Dispose According to Local, State or Federal Laws. Lamp Replacement Procedure E3 Because the lamp is a high temperature and high voltage product, wait at least one hour from the time that the power cord is disconnected before replacing it. The projector lamp is on the top of the projector. 1. Remove the screw shown in the figure below, and then open the cover. /■ ® BB as j© 1 !~!l,!!!!!!!~,!!!!!!!!!n!n!!!!!!!!l! 3 V w - -J 2. Wtih the cover open, remove the three (3) screws on the top of the projector as shown in the figure below. \ I 2-6 Installation and Connection 3. To remove the lamp, hold and then pull the lamp handle as shown in the figure below. Replacing and Cleaning the Filter Precautions when replacing the projector filter: • The filter is on the side of the projector. • Turn off the power of the projector, and then disconnect the power cord after the projector has cooled sufficiently. Otherwise, its parts may be damaged due to internal heat. • When you replace the filter, you may release some dust. • For inquiries on replacement filter purchase, please see 'Contact SAMSUNG WORLDWIDE' in Chapter 5. To replace or clean the filter, follow these steps: 1. Turn off the power of the projector, and then disconnect the power cord after the projector has cooled sufficiently. 2. Open the filter cover. 3. Replace or clean the filter. • When cleaning the filter, use a small vacuum cleaner designed for computers and small electronics products, or wash it under running water. • After washing the filter under running water, make sure to dry it completely. The moisture may cause the filter to corrode. • If dust cannot be separated from the filter or the filter is torn, it must be replaced. • After cleaning or replacing the filter, run
Проекторы - SP-M200S (1.19 mb)
Проекторы - SP-M250S (1.19 mb)