


Оценок - 4, средний балл: 4
(

 )
)
|
Фото и характеристики Sony DPP-FP77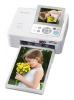 |


Фрагмент инструкции
When the printer is not operated for 5 seconds, demo mode is displayed. If any other button than the 1 (on/standby) button is pressed, the screen returns to the initial display. If a memory card is inserted, or a PC is connected, the images from the connected device are displayed. To print directly from a memory card or an external device, see page 14. To print from a PC, see page 37. Preparations 13 GB Direct printing Direct printing You can change the image preview view by LCD screen display setting the “On-screen Display” from the menu. (page 30) An image preview A Access indication Appears while the printer is accessing a On-screen Display: On memory card or a USB memory. Note On-screen Display: Off While the access indication is displayed, do not remove a memory card or a USB memory, or do not turn off the power. Data may be damaged. B Input/setting indications Input indications and settings information for an image are displayed. Icons Meaning “Memory Stick” media input SD Memory Card input xD-Picture Card input USB memory input DPOF print preset indication C Number of selected images/Total number of image D Ink ribbon indication : P size : Cleaning cartridge E Image file information (file format, file size, image number (folder- file number)*) * DCF-compatible files only. In case of other file formats, only part of file name will be displayed. F Operation tips G Shot or Saved date H Print quantity setting 14 GB D DPOF print preset indication Image list Displays a list of the images stored in the Switching an image preview selected media. and image list DPP-FP67 You can switch the display as follows: DPP-FP77 • To display the image list In an image preview, press the (Index View) button. When there are multiple pages, you can switch pages by pressing f/F. • To display an image preview In the image list, press g/G/f/F to move the cursor to the desired image and press ENTER. In an image preview, you can change the displayed image by pressing g/G . • To enlarge an image In the image preview window, press ENTER. Each time you press the button, the image is enlarged up to 5 times the original scale: x1.5, x2, x3, x4, and then x5. In an enlarged image preview, you can change the portion to be displayed by pressing g/G/f/F. x1 c x1.5 c x2 c x3 c x4 c x5 A Cursor (orange frame) You can move the cursor (selection) by pressing g/G/f/F. B Print quantity setting Appears only when the print quantity is being set. C Scroll bar Indicates the position of the image among the total number of images. Continued 15 GB Direct printing List of icons The following are the icons displayed on the LCD screen. You can proceed with operations by selecting a desired icon with g/G/f/F, and then pressing ENTER. For detailed explanations, see the pages in the parentheses. Icons Meaning Edit (23) Layout Print (25) Batch Print (26) Calendar (27) ID Photo (28) Print setup (29) Edit/Layout Print/Calendar/ID Photo Enlarging and reducing an image size (23) Moving an image (23) Rotating an image (23) (Rotates 90° clockwise.) Adjusting the picture quality of an image (23) Changing a photo into a monochrome one (29) (This option is available only in ID Photo operations.) Resetting edits (24) Printing an edited image (24) Icons Meaning Exiting the menu (25) Batch Print Index Print (26) (Prints all the images in split screens.) Print All (26) (Prints one copy each for all the images.) DPOF Print (26) (Prints the images with the print mark ( ) in an image preview with the preset number of copies in the order they are displayed.) Print setup Date Print (29) Borders/Borderless (30) On-screen Display (30) Color Setting (31) Printer information display (31) Default Setting (32) (Resets the settings to the factory- preset default settings.) 16 GB Basic printing Inserting a memory card Prepare a memory card that contains images for printing: “Memory Stick” media, “Memory Stick Duo” media, SD Memory Card, or an xD- Picture Card. Insert the desired card with its labelled surface facing up into the proper slot until it clicks firmly into place. For the types of memory cards you can use with the printer, please see pages 63 to 65. From the left, with the label side facing up, “Memory Stick” media, (“Memory Stick Duo” media), SD Memory Card, and xD-Picture Card To eject a memory card Remove the memory card from the slot slowly in the reverse direction it was inserted. Notes • Insert only the memory card that you want to use for printing. When multiple memory cards are inserted, the memory card inserted first will have the first priority. • The printer supports both standard and small sizes. A “Memory Stick Duo” media adaptor is not necessary. • To use a memory card, follow the notes described on pages 63 to 65. Printing selected images This section explains how to display the images of a memory card or a USB memory on the printer’s LCD screen and print the selected images (direct printing). For how to print from a USB memory, see page 32. Setting the print...
Эта инструкция также подходит к моделям:Принтеры - DPP-FP67 (2.69 mb)