


Оценок - 3, средний балл: 4.3
(

 )
)
|
Фото и характеристики Royal Sovereign RSS-685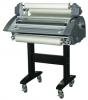 |


Фрагмент инструкции
7. Turn off the power when unattended or not in use. Unplug machine before movig it or when it is not in use for an extended period of time. 8. This machine is intended for indoor use only. 9. Do not alter or extend electric plug. Plug is configured for appropriate electrical supply. 10. The socket-outlet shall be installed mear the equipment and shall be easily accessible. - 3 CHARACTERISTICS RS Roll Laminator Line are advanced laminators with time transcendental design, utilizing the latest in laminating technology. It is designed for you to set temperature and speed as necessary and have the machine remember your settings. Also, you can laminate anything at high speed, regardless of thickness of material and type of film. Remote control device allows for control of the machine from the front or rear. Foot-Pedal Switch allows for hands-free operation. It is also designed for convenient use by anyone through the simple procedure of adjusting film tension in accordancs with the thickness of film and materials to be laminated. SPECIFICATIONS Description RSS-1200 RSS-1050 RSS-685 Unit Dimensions 1550*650*1210(mm) 61*25.6*47.4(in) 1400*650*1210(mm) 55.1*25.6*47.4(in) 1070*650*1205(mm) 42.1*25.6*47.4(in) Unit Weight 190(Kg) 418(lbs) 140(Kg) 308(lbs) 100(Kg) 220(lbs) Voltage/Cycles AC 100~120/ 200~240V 50~60Hz Power Consumption 3000W 3000W 2000W Max.Laminating Speed 6m/min (19.7ft/min) Max.Laminating Width 1200(mm) 47.2(in) 1050(mm) 41.3(in) 685(mm) 27(in) Max.Laminating Thickness 13mm ( 0.5in) Film Thickness 25~250mic (1 ~ 10mil) Cold and Hot Laminating Yes Cooling Blower 2 2 1 Paper Counting Yes Length Measurement Yes Take Up Yes Film Alignment Yes Cutter-Cross Yes Foot-Switch Yes - 4 NAMES OF MAJOR PARTS OF MACHINE 1 2 34 5 6 7 8 9 10 11 12 13 14 1. FILM-UPPER 8. FOOT SWITCH 2. FILM-LOWER 9. REMOTE CONTROL SWITCH 3. TAKE-UP (ASS'Y-TAKE-UP) 10.CONTROL PANEL 4. IDLER BAR (UPPER) 11.PRESSURE LEVER 5. TABLE-FRONT 12.TENSION CONTROL KNOB 6. SHOE-HEATER,UPPER 13.ALIGNMENT KNOB 7. ASS'Y-STAND 14.TAKE-UP SWITCH - 5 1. HOW TO CONTROL TENSION 2. HOW TO ADJUST ALIGNMENT Location control device is used when the edges of the lamination are unjustified. As the drawing shows, when the alignment knob is turned clockwise, the upper film is to left. Once proper alignment is reached, turn the Locking Nut tight against the Alignment knob so the adjustment is set. ADJUSTMENT OF FILM TENSION AND LOCATIONS can adjust it, to some extent, and make wrinkles straighten from Anti-Wrinkle Part of the Tension of film can be controlled depending on the state of lamination, but basically you heat shoe. To increase the tension on the film, turn the knob clockwise. To lower the tension, turn the handle counter clockwise. If lamination is curved upward, it means that tension of upper film is high. In this case, it can be controlled by raising moved to right. On the contrary, when the handle is turned counter-clockwise, it is moved apply the method in reverse. tension of lower film or lowering tension of upper film. If lamination is curved downward, Alignment Knob. Locking Nut Tension Control Knob .. ..... .. .. Film Shoe-Heater Film Anti-Wrinkle device - 6 - 1. Set the glossy side of upper/lower film to face the heat. ( Glossy side is PET film and matte side is thermal polymer laminating film.) 2. Like picture 1, insert core into the left side of upper/lower film shaft. 3. Like picture 2 and 3, insert core into the right side of upper/lower film. 4. Like picture 4 and 5, adhere core closely. (Make the right/left direction of fixing screw consistent.) 5. Locate film in the middle, and then fasten core fixing screw. SETTING UP FILM Picture 1 Upper Film Lower Film Upper Film Lower Film Picture 2 Picture 3 Picture 4 Picture 5 Core Fixing Screw - 7 - 1. HOT FILM 10. After checking the status of lamination, Place the pressure lever at the proper lamination mode. 6. Allow some of the film with melted resin to stick to the Guiding Paper. 7. Repeat step 5 with lower roll film then stick it to the Guiding Paper. fed through to the rear roller without tension. 8. Unwind 30~40cm(1~1.3ft) of both rolls of film, to loosen the film tension. This should be 1. Insert the bar into the core of roll film then place the bar on the machine. HANGING FILM beyond the second set of rollers. 9. Set speed at 1 and press the "RUN" button to feed film into the machine. 2. Place the Pressure Lever to the open mode (10~13mm). 3. Insert a piece of lightweight cardboard (Guiding Paper) between the rollers, through to **IMPORTANT : It should reach beyond the second set of rollers. It should stick out 5cm (2") in front of front roller. 4. Pull the upper film around the upper idler bar to the anti-wrinkle device and stretch out the film on the upper heat shoe. 5. When the temperature reaches 80°C (176°F), the resin is melting, stick the film on the shoe. SHAFT LOWER IDLE BAR UPPER ROLL FILM SHAFT LOWER ROLL FILM GUIDING PAPER HEAT SHOE UPPER IDLE BAR LOWER FILM SHAFT LOWER IDLE B...
Эта инструкция также подходит к моделям:Ламинаторы - RSS-1050 (1.18 mb)
Ламинаторы - RSS-1200 (1.18 mb)