


Оценок - 0, средний балл: 0
(
 )
)
|
Фото и характеристики Olympus TG-810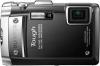 |


К этому устройству также есть другие инструкции:
Фрагмент инструкции
Icon Guide Submenu 2 Application Off No icon guide is displayed. On The explanation of the selected icon will be displayed when a shooting mode or function menu icon is selected (position the cursor on the icon for a while to display the explanation). Icon guide 14M44 0.00.0 AUTOWBAUTOWB AUTOISOAUTO ISO PP3D3D Functions can be changed manually. Program AutoProgram Auto MENUMENUNORM If the date and time are not set, the [Date Stamp] setting cannot be set. “Date, time, time zone, and language” (p. 18) The date stamp can not be deleted. [Date Stamp] is not available in [Panorama] or [3D Photo] mode. The date stamp cannot be imprinted when taking sequential shots. Recording sound when shooting movies [RR]] A (Movie menu) ..RSubmenu 2 Application Off No sound is recorded. On Sound is recorded. EN 43 For information on using the menus, see “Setup menu” (p. 6). For information on using the menus, see “Setup menu” (p. 6). Using an externalflash [Remote Flash] J(Shooting menu 2) .. Remote Flash Submenu 2 Application Off The external flash is not available. #RC Slave An Olympus Wireless RC Flash System compatible flash is used for taking pictures. (Channel: CH1, Group: A) The commercially-available slave flash that is synchronized with the camera flash is used for taking pictures. The flash intensity setting can be adjusted. Taking pictures with the Olympus Wireless RC Flash System You can take pictures with a wireless flash when using a flash compatible with the Olympus Wireless RC Flash System. This enables multi-flash photography using multiple flash units compatible with this system. The camera’s built-in flash is used for communication between the camera and flash. For details about operation of a wireless flash, refer to the instruction manual for the special external flash. 1 Set the wireless flash based on the guidelines below. Wireless flash setup range guidelines The setup range varies depending on the ambient environment. 10m 30° 30° 5m 50° 50° 50° 50° 30° 30° Point the remote sensor toward the camera Flash direction 2 Turn on the wireless flash. 3 Use the MODE button on the wireless flash to set to RC mode, and make the channel and group settings. (Channel: CH1, Group: A) 4 Set [Remote Flash] (p. 44) on the camera to [#RC], and set the channel to the same setting as the wireless flash. 5 Select the flash mode. “Using the flash” (p. 35) 6 Take a test shot to check the operation of the flash and the resulting image. Be sure to check the charge level of the camera and wireless flash before taking pictures. Although there is no limit on the number of wireless flash units that are set up, usage of a maximum of three units is recommended to prevent malfunction due to interference with each other. When the camera flash is set to [#RC], the camera built-in flash is used for communication with the wireless flash. It cannot used for taking pictures. 44 EN For information on using the menus, see “Setup menu” (p. 6). For information on using the menus, see “Setup menu” (p. 6). Menus for Playback, Editing, and Printing Functions The default settings of the function are highlighted in . Data must be created with the ib (PC software) before using some functions. Refer to the ib (PC software) help guide for details on how to use the ib (PC software). For details on installing the ib (PC software), see “Charging the battery and setting up using the supplied CD” (p. 14). Playing back pictures automatically [Slideshow] q (Playback menu) .. Slideshow Submenu 2 Submenu 3 All/Event/ Slide Collection*1 Off/Cosmic/ Breeze/ BGM Mellow/ Dreamy/ Urban Standard/ Type Fade/Zoom Start . Application Selects the content to be included in the slideshow. Selects the background music options. Selects the type of transition effect used between slides. Starts the slideshow. *1 The [Collection] that has been created with the ib (PC software) and imported back from a computer can play back. During a slideshow, press Ito advance one frame, Hto go back one frame. Searching for images and playing back the related images [Photo Surfing] q (Playback menu) .. Photo Surfing In [Photo Surfing], images can be searched and related images can be played back by selecting the related items. T o start [Photo Sur fing] Press the Abutton to start [Photo Surfing]. When a related item of the image displayed is selected with FG, images related to the item are displayed in the lower part of the monitor. Use HIto display an image. To select related items that are not displayed, press the Abutton when selecting an item. To stop [Photo Surfing], use FGto select [ALL], and press the Abutton. Related items Images corresponding the related items 35.N139.E35.N 139.E 2011/ 02/262011/ 02/26 ALLALL EN 45 For information on using the menus, see “Setup menu” (p. 6). For information on using the menus, see “Setup menu” (p. 6). Using the ib (PC software) and importing data back to the camera Refer to the ib (PC software) help guide for details on how to use the ib (PC software...
Эта инструкция также подходит к моделям:Фотоаппараты - TG‑810 (2.8 mb)