


Оценок - 5, средний балл: 4.4
(

 )
)
|
Фото и характеристики Sony BDV-E880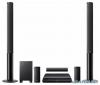 |


К этому устройству также есть другие инструкции:
Домашние кинотеатры - BDV-E880 (3.64 mb)
Домашние кинотеатры - BDV-E880 (4.04 mb)
Домашние кинотеатры - BDV-E880 (4.33 mb)
Фрагмент инструкции
(The location differs based on the selected function.) RETURN Returns to the previous display. C/X/x/c Moves the highlight to a displayed item. (enter) Enters the selected item. 12GB E EG (muting) Selects the playback source. HOME (pages 24, 40, 43, 44, 47, 49, 53) Enters or exits the system’s home menu. SOUND MODE (page 38) Selects the sound mode. F Playback operation buttons See “Playback” (page 29). ./> (previous/next) Skip to the previous/next chapter, track, or file. (replay/advance) Briefly replay the current scenes for 10 seconds./Briefly fast forwards the current scenes for 15 seconds. m/M (fast/slow/freeze frame) Fast reverse/fast forward the disc during playback. Each time you press the button, the search speed changes. Activates slow-motion play when pressed for more than one second in pause mode. Plays one frame at a time when pressed in pause mode. Slow-motion and single-frame playback are not available for Blu-ray 3D Discs. N (play) Starts or re-starts playback (resume play). Activates One-Touch Play (page 42) when the system is on and set to the “BD/DVD” function. X (pause) Pauses or re-starts playback. x (stop) Stops playback and remembers the stop point (resume point). The resume point for a title/track is the last point you played or the last photo for a photo folder. Radio operation buttons See “Tuner” (page 40). PRESET +/– TUNING +/– Turns off the sound temporarily. (audio) (pages 38, 39) Selects the audio format/track. 2 (volume) +/– (page 40) Adjusts the volume. DISPLAY (pages 29, 33, 47) Displays playback and web browsing information on the TV screen. Displays the preset radio station, frequency, etc., in the front panel display. Displays the stream information/decoding status in the front panel display when the function is set to other than “BD/DVD.” When the system is set to the “HDMI1,” “HDMI2,” “TV,” or “SAT/CABLE” function, the stream information/decoding status appears only when a digital signal is input. The stream information/decoding status may not appear depending on the stream or item being decoded. SLEEP (page 45) Sets the sleep timer. H (subtitle) (page 56) Selects the subtitle language when multilingual subtitles are recorded on a BDROM/ DVD VIDEO. I Operation mode buttons (page 46) Changes the component to be operated on the remote. BD: You can operate this Blu-ray Disc/ DVD Home Theatre System. TV: You can operate a TV. STB: You can operate a cable box, digital satellite receiver, digital video receiver, etc. (favorites) Displays the Internet contents added to the Favorites List. You can save 18 favorite Internet contents. 13GB Getting StartedGetting Started Getting StartedGetting Started Step 1: Installing the System How to position the system Install the system by referring to the illustration below. A Front speaker (L (left)) B Front speaker (R (right)) C Center speaker D Surround speaker (L (left)) E Surround speaker (R (right)) F Subwoofer G Unit ABDECGF • Use caution when placing the speakers and/or speaker stands attached to the speakers on a specially treated (waxed, oiled, polished, etc.) floor, as staining or discoloration may result. • Do not lean or hang on a speaker, as it may fall down. • To assemble the speakers, refer to the supplied “Speaker Installation Guide.” • You can install the speakers on a wall. For details, refer to the supplied “Speaker Installation Guide.” 14GB Step 2: Connecting the System Step 2: Connecting the System . Do not connect the AC power cord (mains lead) of the unit to a wall outlet (mains) until all the other connections are made. To assemble the speakers, refer to the supplied “Speaker Installation Guide.” • When you connect another component with a volume control, turn down the volume of the other components to a level where sound is not distorted. Connecting the speakers To connect speaker cords to the speaker You need to connect a speaker cord to each of the front, center, and surround speakers. The connector of the speaker cords and the color tube are color-coded based on the speaker type. Be sure to match the speaker cords to the appropriate terminals on the speakers: the speaker cord with the color tube to 3, and the speaker cord without the color tube to #. Do not catch the speaker cord insulation (rubber covering) in the speaker terminals. Color tube (–) (+) Connector Rear or bottom of the speaker 15GB Getting Started Getting Started Getting Started Connect the speaker cords to match the color of the SPEAKERS jacks of the unit. When connecting to the unit, insert the connector until it clicks. White (Front left speaker (L)) Purple (Subwoofer) Red (Front right speaker (R)) Green (Center speaker) FRONT R FRONT L SUR R SUR L CENTERSUBWOOFER SPEAKERS Gray (Surround right speaker (R)) Blue (Surround left speaker (L)) Rear panel of the unit 16GB Connecting the TV Connecting the TV Depending on the jacks and functions on your TV, select the connection method. • When your TV has an HDMI jack that is marked “ARC*”: Connection A...