


Оценок - 2, средний балл: 4
(

 )
)
|
Фото и характеристики Canon Digital IXUS 870 IS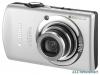 |


К этому устройству также есть другие инструкции:
Фрагмент инструкции
2 Click [Cancel] ( in Windows Vista) to close the Events Dialog (or the slide show screen) if it appears. If CameraWindow appears, click [Operate Images on Camera] followed by in the View Window to close CameraWindow. CameraWindow Windows Thumbnail Window View Window Using the Software on the Windows Platform – Advanced Techniques 33 3 In the [Start] menu, select [All Programs] or [Programs], followed by [Canon Utilities], [CameraWindow], [RemoteCapture DC 3] and [RemoteCapture DC]. According to the default settings, recorded images are saved into the [Pictures] or [My Pictures] folder. To change the destination, open the [File] menu in the remote shooting window and select [Preferences]. 4 Click and check the subject in the viewfinder. 5 Change the image size or resolution, the rotation settings and the settings at the bottom of the window as required. 6 Click the [Release] button. •You can release the shutter by pressing the camera’s shutter button or the keyboard’s space key. •Other than the shutter button, the camera's buttons and switches, including the zoom, cannot be operated while the camera is being controlled with the Remote Shooting function. •You may notice that the interval between the shutter release and activation is slightly longer for remote shooting than when the camera is used independently. Windows Shows/Hides the viewfinder or detailed settings area. You can add comments to images by placing a check mark here and typing text in the boxes below. Viewfinder Display Click the [Start/Stop Viewfinder] button while a connection to the camera is open to display the image appearing in the camera’s viewfinder. Using the Software on the Windows Platform – Advanced Techniques Size and Resolution Selector Selects the size and resolution at which images are captured. balance. Set the basic camera settings here. Rotation Settings Sets the rotation parameters for images after they are captured. Release Button Releases the shutter. Slide this to zoom the camera in or out. Start/Stop Viewfinder Button Starts or stops the viewfinder display. Refresh Button Resets the exposure, focus and white Windows The settings available vary between camera models. Using the Software on the Windows Platform – Advanced Techniques Merging Panoramic Images – PhotoStitch You can create a wide panoramic image by merging images of a scene shot separately. PhotoStitch automatically detects the overlapping areas of adjacent images and corrects for the size and orientation. You can also manually specify the overlapping areas. 1 Click [Edit] in the ZoomBrowser EX’s Main Window and click [Stitch Photos]. 2 Click [1. Select Images] and select several images in the Browser Area. 3 Click [2. Open PhotoStitch]. Instructions Windows Merge the images following the instructions in the guidance panel at the top of the PhotoStitch window. Images Shot in Stitch Assist Mode It is easy to merge images if they are shot with the camera's Stitch 4 Assist mode because PhotoStitch can automatically detect the image order and orientation. The series of images are saved together in a single folder when they are downloaded from the camera. Symbol displayed by images shot in Stitch Assist mode. •Some camera models may not support Stitch Assist mode. •See the Camera User Guide for information about shooting in Stitch Assist mode. •Images shot in Stitch Assist mode with a wide converter, teleconverter or close-up lens cannot be merged accurately. Using the Software on the Windows Platform – Advanced Techniques Processing RAW Images RAW images contain ‘raw’ data that has not been subjected to any compression processing by the camera. Since the data is captured in a proprietary format, it cannot be handled or displayed by standard software programs. You can use Digital Photo Professional to adjust and convert RAW images into standard JPEG or TIFF images with minimal image quality loss. •RAW images can only be recorded on models that list RAW as one of the data types in the Specifications section of the Camera User Guide. •Only RAW images compatible with Digital Photo Professional can be converted. Be sure to refer to the Data Type item in the Specification section of the Camera User Guide. •The use of Digital Photo Professional is recommended on computers that satisfy the following system requirements. CPU: Core 2 Duo or better •You can download a PDF manual from the Canon website that explains in detail how to use Digital Photo Professional. Converting Images 1 Click [Edit] in ZoomBrowser EX’s Main Window, followed by [Digital Photo Professional Process RAW Images]. 2 Select a RAW image in Digital Photo Professional’s Main Window. 3 Click (Edit image window). Main Window Selects folders containing images. Windows separately with the Tone Curve. Using the Software on the Windows Platform – Advanced Techniques 37 4 Adjust the image brightness and white balance in the tool palette. The modified contents (the information for image processing requirements) a...
Эта инструкция также подходит к моделям:Видеокамеры - PowerShot SX10 IS (9.73 mb)
Видеокамеры - Digital IXUS 980 IS (9.73 mb)