


Оценок - 1, средний балл: 5
(
 )
)
)
|
Фото и характеристики Canon DC22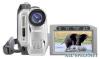 |


Фрагмент инструкции
You can also choose to display instead the date and time when the scene was recorded and additional recording data ( 37). • ....As long as you don’t turn off the camcorder you can resume playback from the point you stopped last. Special Playback Modes POINTS TO CHECK Fast Forward Playback / Fast Reverse Playback During normal playback, press or on the camcorder ( SEARCH or SEARCH on the wireless controller). Repeatedly press the button to increase the playback speed. Fast playback: 5x .. 15x .. 25x the normal speed. Playback Pause During normal playback, press / on the camcorder ( PAUSE on the wireless controller). Slow Forward Playback / Slow Reverse Playback During playback pause, press or on the camcorder ( SLOW or on the wireless controller). Repeatedly press the button to increase the playback speed. Slow playback: 1/16 .. 1/8 .. 1/4 the SLOW normal speed. Skipping Scenes During normal playback, push the multi selector ( ) on the camcorder ( NEXT on the wireless controller) to skip to the beginning of the next scene. Push the multi selector ( ) on the camcorder ( PREV. on the wireless controller) to return to the beginning of the current scene. Repeat to skip to the beginning of the previous scene. NOTES • ....There is no sound during special playback modes. • ....During some special playback modes, you may notice some disturbances in the playback picture. • ....Slow playback is not available with discs initialized in VIDEO mode. • ....Depending on the recording, you might occasionally notice a brief stop of the picture or sound at the point where the scene changes. Playback 35 Adjusting the Volume The camcorder plays the sound with the built-in speaker. The volume will be muted when you close the LCD panel. ( 13) SYSTEM SETUP Speaker VOLUME MENU ( 27) 1 Press MENU . 2 Select ( ) [SYSTEM SETUP] and press ( ). 3 Select ( ) [VOLUME] and press ( ). 4 Adjust ( ) the volume as desired and press ( ). To turn off the volume completely, keep pressing ( ) until the volume icon changes to . 5 Press to save the setting and close the menu. MENU Viewing Still Images E ( 13) 1 Move the power switch to ON, then slide it down towards MODE and release it to set the camcorder in PLAY mode. The green PLAY indicator will turn on. 2 Move the / switch to the (Still images) position. 3 If necessary, change the media for the still images. Refer to Selecting the Media for the Still Images ( 32). 4 Use the multi selector ( ) to move between images. IMPORTANT • ....The following may not be displayed correctly. -Images not recorded with this camcorder. -Images edited on or uploaded from a computer (except for the sample images for the Card Mix function). -Images whose file names have been changed. • ....Avoid the following actions while the disc/card access display ( or ) appears on screen, and when either the DISC access or CARD access indicator is on or flashing. Failing to do so may result in permanent data loss. -Do not subject the camcorder to vibrations or strong impacts. Basic Functions 36 36 Playback -Do not open the disc cover or the memory card slot cover and do not remove the disc or memory card. -Do not disconnect the power source or turn off the camcorder. -Do not change the position of the / switch or the operating mode. Slideshow SLIDESHOW FUNC. ( 27) 1 Press FUNC. . 2 Select ( ) [ SLIDESHOW] and press ( ). 3 Select ( ) [START] and press ( ). • Images are played back one after another. • Press FUNC. to stop the slideshow. Index Screen 1 Move the zoom lever toward W. The still images index screen appears. 2 Select ( , ) an image. • Move the cursor to the image you want to view. • Press + or - on the camcorder ( NEXT or PREV. on the wireless controller) to move to the next/previous index page. 3 Move the zoom lever toward T. The index screen closes and the selected image is displayed. Image Jump Function You can also quickly locate a specific image without having to browse all of them one by one. Push the multi selector ( ) and keep it pressed down. Image numbers will quickly run in sequence. When you release the multi selector the image corresponding to the number selected will be displayed. Magnifying the Still Image During playback, still images can be magnified up to 5 times. ( 13) Zoom lever Multi selector 1 Move the zoom lever toward T. • The image is magnified by 2 times and a frame appears indicating the position of the magnified area. • To further enlarge the image, move the zoom lever toward T. To reduce the magnification to less than 2 times, move the zoom lever toward W. • will appear for images that cannot be enlarged. 2 Select the part of the image to be magnified with the multi selector. • Move ( , ) the frame to the part of the image you want to see enlarged. • To cancel the magnification, move the zoom lever toward W until the frame disappears. Playback 37 Selecting the Recording Data Display The camcorder keeps a data code containing the recording date and time and other camera data such as shutter ...