


Оценок - 0, средний балл: 0
(
 )
)
|
Фото и характеристики Yamaha CLP-380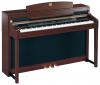 |


К этому устройству также есть другие инструкции:
Синтезаторы/фортепиано - CLP-380 (3.33 mb)
Синтезаторы/фортепиано - CLP-380 (139.01 kb)
Синтезаторы/фортепиано - CLP-380 (258.63 kb)
Фрагмент инструкции
This version provides additional functions and has some changed Wireless LAN displays. • New and updated functions in Wireless LAN display • Adding Settings Since a push-button method for WPS setup is added, settings for the wireless network can easily be made. • Enhanced security The instrument now includes settings for the robust WPA/WPA2 security format, the types of which are listed below. WPA-PSK (TKIP), WPA-PSK (AES), WPA2-PSK (TKIP), WPA2-PSK (AES) The settings here are available only when using a USB Wireless LAN adapter (using DHCP). Please replace the instructions beginning on page 54 in your Owner’s Manual (through step 4) with the section “About the Internet Settings (settings concerning the access point)” below, then configure the settings. NOTE Some USB Wireless LAN adaptors do not support WPA and the push-button method for WPS setup. For a list of USB Wireless LAN adaptors whose compatibility have been confirmed by Yamaha, refer to the Yamaha website: NOTE To configure the setting for the Wireless LAN using the push-button method for WPS setup, the access point must correspond to the push-button method for WPS setup. For details about checking or changing the settings of the access point, refer to the owner's manual of the Wireless LAN router (access point). NOTE The CLP-380 does not support the PIN method. CLP-380 Version 1.10 New Functions 1 About the Internet Settings (settings related to WPS and the access point) About the Internet Settings (settings related to WPS and the access point) Using the push-button method for WPS setup When the Wireless LAN router (access point) you are using is compatible with the push- button method for WPS setup, the settings for the wireless network can be automatically made. 1. Call up the Internet Setting display. Hold down the [FILE/SONG SETTING] button and press the [REC]. Internet Setting display Wireless Execute?__> WPS(PushButton) 2. Execute the setting using WPS (Push-Button). If “ WPS (PushButton)” does not appear in the lower left of the display, press the C [-] button to call up “ WPS (PushButton).” Press the B [+ (YES)] button located next to “Execute?- ->” to execute the setting using WPS (PushButton). WPS (PushButton) executing display Executing 3. Press the WPS button of the access point you are using within two minutes. The settings for SSID, channel, security and key are automatically configured. The process of settings using the WPS (PushButton) is complete. After the WPS (PushButton) completion display briefly appears followed by a ‘Save Settings’ and ‘Check Connection’ display (page 57), save the settings in this display. WPS (PushButton) completion display If you are not using a USB Wireless LAN adapter (using DHCP), refer to the following URL: radio/connect.html For details about checking or changing the settings of the access point, refer to the owner’s manual of the Wireless LAN router (access point). Wireless Completed WPS(PushButton) CLP-380 Version 1.10 New Functions 2 Searching for the access point. Searching for the access point. 1. Call up the Internet Setting display. Hold down the [FILE/SONG SETTING] button and press the [REC] button. Internet Setting display Wireless Execute?__> NetworkSearch 2. Start the Network Search (searching for the access point). If the “ NetworkSearch” indication does not appear in the lower left of the display, press the C [+] button to call up “ NetworkSearch.” Press the B [+ (YES)] button located next to “Execute?- ->” to start the search for the access point. When searching for an access point, the display shows the access point(s) near the Clavinova. Once you select the desired access point, the SSID and channel are automatically set. The key is not entered automatically. You have to set it by yourself if you select an encrypted access point (the “ ” key icon appears). Wireless Execute?__> NetworkSearch Access point(s) Wireless Select?__> : abcdefghijk(C01) :abcdefghijk(C01) Key icon SSID Channel 3. Selecting the access point 3-1 Access point is shown in the display. If there are multiple access points, use the C [-][+] buttons to select the desired one, then select the access point you are using. 3-2 Make sure that the “ ” key icon appears and then press the B [+ (YES)] button to determine the selected access point. No “ ” key icon Since your access point does not have an encrypted setting, the setting of the access point is complete. After the “Save the Settings and Check the Connection” display on page 57 appears, press the B [+ (YES)] button and then save the settings. If no signal from the access point is received, the access point cannot be displayed. If you want to encrypt the access point, change this in the settings of the access point side and then configure the settings again. CLP-380 Version 1.10 New Functions 3 With key icon “ ” With key icon “ ” Key Input display Wireless Input?__> Key: ***** WPA2 _ TKIP 4. Input the key....