


Оценок - 4, средний балл: 4.5
(

 )
)
|
Фото и характеристики M-Audio KeyStation 61es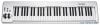 |


Фрагмент инструкции
When Channel 16 is reached and “+” is pressed, Channel 1 will be selected. If the Octave “+” and “-” keys are selected to vary the Channel, the lights above the buttons will not change, since it is not possible to have a Channel with a negative value. Pressing both the “+” and “-” buttons together will recall Channel 1. Program Change Program Changes are used to change the instrument or voice you are using. For the sake of example, we will change the instrument to a bass sound. To do this we need to send a program change of 32, which will select an acoustic bass sound from the General MIDI Instruments list in the Appendix. There are two ways to send a program change: 1. Incremental/Decremental Program Change: < Press the Advanced Functions button. < Press the black key above F1 (named F# 1). < Now the Octave “+” and “-” keys can be used to change the program. < Press “+” and continue to play notes until you find the instrument you want. 2. Quick Select Program Change: < Press the Advanced Functions button. < Press the black key above F4 (named F# 4), representing “Program.” < Press keys C4, then E3 then C5. This enters the combination: “3,” “2,” “ENTER.” Alternatively, you can use the “+” and “-” buttons to change the value, then press ENTER. Now the keyboard will play a bass sound: Number 32 as listed in the General MIDI Instruments list. The first method is useful if you want to cycle through different instruments to see which sounds best in your song. The second is more useful if you want to select a specific number, as is the case here. If the Octave “+” and “-” keys are selected to vary the Program number (Method 1), the lights above the buttons will not change, since it is not possible to have a Program with a negative value. Pressing both the “+” and “-” buttons together will recall Program 0, which selects a grand piano sound. The full list of instruments that can be accessed via Program Changes is listed in the Appendix at the end of this manual. 7 Bank LSB and Bank MSB Program Changes are most commonly used to change instruments and voices. However, the number of instruments accessible via Program Changes is limited to 128. Some devices have more than 128 voices and require a different method to access these extra voices. Generally, these devices use Bank LSB and Bank MSB messages. 1. Incremental/Decremental Bank LSB and Bank MSB Changes: < Press the Advanced Functions button. < Press the black key above G1 (named G# 1). < Now the Octave “+” and “-” keys can be used to change the program. < Press “+” and continue to play notes until you find the instrument you want. 2. Using the Quick Select Method: < Press the Advanced Functions button. < Press the black key above G4 (named G# 4), or A4 (named A# 4), representing Bank LSB or Bank MSB respectively. < Press keys C4, then E3 then C5. This enters the combination: “3,” “2,” “ENTER.” Alternatively, you can use the “+” and “-” buttons to change the value, and then press “ENTER.” As with Program Change, if the Octave “+” and “-” keys are selected to vary the Bank LSB or MSB number (Method 1), the lights above the buttons will not change, since it is not possible to have a Bank with a negative value. Pressing both the “+” and “-” buttons together will recall Bank 0. The Modulation Wheel It is possible to assign MIDI effects to the Modulation Wheel. Some useful effects are: < 01 Modulation < 07 Volume < 10 Pan (balance) < 05 Portamento There are 131 effects in total. However, for these effects to have any affect on the sound, the receiving MIDI device must be able to read and respond to these MIDI effect messages. Most devices will at least respond to volume, modulation, and pan data. (The full list of effects is given at the back of this manual.) To assign an effect to the Modulation Wheel: < Press the Advanced Functions button to engage Edit Mode. < Press the black key above C4 (named C# 4), representing “WHEEL ASSIGN.” < Use the Numerical Data Entry keys G3-B4 to enter the number of the effect you want to assign to the Modulation Wheel. Alternatively, you can use the “+” and “-” buttons to change the value. < Press the ENTER key (C5). < Move the Modulation Wheel upwards to increase the value of the effect. If you have made an error while entering the numerical data value, you can press the CANCEL key (C1) to exit Edit Mode without changing the effect assigned to the Modulation Wheel. Note that each time the keyboard is turned off, the data assigned to the Modulation Wheel will be lost. Each time the keyboard is powered up, the Modulation Wheel will be assigned to modulation (effect number 01) by default. For the sake of example, we will assign effect number 10 (pan, or balance) to the Modulation Wheel. < Press the Advanced Functions button to engage Edit Mode. < Press the black key above C4 (named C# 4), representing “WHEEL ASSIGN.” < Press A3 to enter “1.” < Press G3 to enter “0” so you have entered “10.” < Press C5 for “ENTER.” The Volume Slider As wi...
Эта инструкция также подходит к моделям:Синтезаторы/фортепиано - KeyStation 49e (678.6 kb)
Синтезаторы/фортепиано - KeyStation 88es (678.6 kb)