


Оценок - 0, средний балл: 0
(
 )
)
|
Фото и характеристики NETGEAR D6300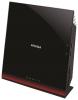 |


К этому устройству также есть другие инструкции:
Фрагмент инструкции
WPS Method WPS lets you join your WiFi network without typing the password. If your wireless device supports WPS, the first time you join the network, you might be prompted to press the WPS button on the modem router. 1. Press the WPS button on the modem router. 2. Within 2 minutes, press the WPS button on the computer or wireless device that is trying to join the network. Follow the WPS instructions that came with your computer or wireless device to join the network. Note: Some older wireless computers or devices cannot use WPS. Manual Method 1. On your computer or wireless device, open the software that manages its wireless connections. This software scans for wireless networks in your area. 2. Look for the WiFi network name (SSID) on the list and select it. The SSID is on the label on the bottom of the modem router. Note: If you changed the name of your network during the setup process, look for that network name. 3. Enter the preset password (or your custom password if you changed it), and click Connect. After you use genie to set up the modem router, you can log in to the modem router to view or change its settings. 1. Launch a web browser from a computer or wireless device that is connected to the modem router. 2. Type or in the address field of the browser. A login screen displays: 3. Enter admin for the user name and password for the password. The genie Home screen displays: See the User Manual for information about the modem router screens and features. The genie app is your home network dashboard. It lets you easily view, manage, and control your entire home network, and helps you fix common network problems. You can use the genie app or the genie mobile app. Internet STATUS G OOD Network Map Number of devices 16 Parental Controls WiFi Connection STATUS Connected Router Settings Click here ReadySHARE Click here Click here genie app Visit the NETGEAR genie web page at: 1. Using your mobile device, navigate to the Apple AppStore or Android Market, and search for NETGEAR genie. 2. Install the app on your iPad or phone. Launch the app, and it displays the dashboard screen. ReadySHARE Access After installation, you can insert a USB storage device into the USB ports on the modem router and share the contents with others on the network. (If your USB device has special drivers, it is not compatible.) USB port on the rear USB port on the side If your USB device needs a power supply, you have to use it when you connect the USB device to the USB port. It might take up to 2 minutes before the USB drive is ready for sharing after you connect it. On Windows systems, use any of these methods: • Select Start > Run and enter \\readyshare in the dialog box. Click OK. • Open Explorer or Safari and enter \\readyshare in the address bar. • Open My Network Places, and enter \\readyshare in the address bar. On Mac systems, do this: 1. Select Go > Connect to Server. 2. Enter smb://readyshare as the server address. 3. Click Connect. The readyshareconnect.exe file (for Windows) is available to download here: The USB Control Center utility allows you to control a shared USB device from your computer that is connected to the USB port on your router. The utility allows you to control a printer. Install the utility on each computer on your network from which you want to control the device. You can download this utility at When you launch the USB Control Center utility, a screen similar to the following displays: The main screen shows a device icon, the description for this USB device, and its status. Available. The device is available from the computer that you are using. Waiting to Connect. You need to connect to this device from the computer that you are using. The first time you connect, you might be prompted to install the device driver. The following menu selections are available: • System. Exit the utility. • Tools. Access the Control Center Configuration to set up your shared USB device. See the following section, Control Center Configuration. • About. View details about the USB Control Center software. Control Center Configuration Select Tools > Configuration to display the following screen: Automatically execute when logging on Windows. Select this check box to have the utility start automatically when you are logged in to Windows. Timeout. Specify the time-out value for holding the USB resource when it is not in use. Language. Select the display language for this utility. The first time that you use a printer, you need to click Connect. You might be asked to install the driver for this printer. After the driver is installed, the printer status changes to Available. Note: Some USB printers (for example: HP and Lexmark printer) request that you do not connect the USB cable until the installation software prompts you to do so. If the USB printer is detected and connected automatically,...