


Оценок - 0, средний балл: 0
(
 )
)
|
Фото и характеристики NETGEAR WNCE2001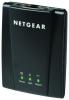 |


К этому устройству также есть другие инструкции:
Сетевое оборудование - WNCE2001 (679.35 kb)
Сетевое оборудование - WNCE2001 (2.02 mb)
Фрагмент инструкции
Look for the or symbols on the router to make sure the NETGEAR router supports WPS. For non-NETGEAR routers, please refer to the user manual to determine if the router supports WPS. Once you know whether your router supports WPS, choose the appropriate installation method below. WPS (WiFi Protected Setup) is a simple and secured way to connect a device to an existing network. Installation with WPS Step 1: Connect the WNCE2001 to your TV, XBox, or Blu-ray player using the Ethernet cable (included) and one of the power connection options. For more information on power-up methods, see “Power Connection Options” on the reverse side. Step 2: Wait until the Power LED on the WNCE2001 is solid green. Push the WPS button on the WNCE2001. The WLAN LED will blink amber and Installation without WPS Step 1: Please disconnect any wireless connection to the router and/or remove the Ethernet cable currently connected to the computer. You may restore the connection after the WNCE2001 installation is complete. Step 2: Connect the WNCE2001 to your computer, using the Ethernet cable (included) and one of the power connection options. For more information on power-up methods, see “Power Connection Options” on the reverse side. Step 3: Wait until both the Power and LAN LEDs are solid green. Make sure the computer gets the IP address. Then, open green, showing that the WPS is running. Step 3: Push the WPS button on your router. The WLAN LED on the WNCE2001 will stay green for 5 seconds when the wireless connection has been established. Step 4: Congratulations! Your installation is complete. your Internet browser and it will automatically take youto the setup page. Follow the instructions on the setup page, then return to this guide and continue to Step 4. Step 4: Disconnect the Ethernet and USB cables from your computer. Step 5: Connect the WNCE2001 to your TV, Box, or Blu-ray player. If your device doesn’t have a USB port, see “Power Connection Options” on the reverse side. WPS button Step 6: Congratulations! Your installation is complete. NOTE: Make sure you go through the connection settings on your TV, XBox, or Blu-ray player after the WNCE2001 is configured and connected. If asked for the type of connection, make sure WIRED is selected. Power Connection Options You can power on your WNCE2001 using either of these methods: • Connect the WNCE2001 to a wall outlet with the included power adapter. Power adapter • Connect the WNCE2001 to any USB port using the included USB power cable: USB power cable NOTE: Depending on the cable that you received in the box, you may or may not need a plug converter to connect the WNCE2001 to the power adapter or the USB cable. If it is needed, the plug converter is included in the box. July 2010 FAQ 1. Which power connection options should I choose? Many consumer electronics devices have Ethernet and USB ports in close proximity. Using the USB power cable option allows you to free up one power outlet that can be used for something else. Even if the device to which you connect the WNCE2001 does not have a free USB port, as long as there is a free USB port on a neighboring device within cable length of the WNCE2001, and that device can be turned on when you use the WNCE2001, you can plug the USB power cable into the neighboring device. Note that some USB ports on consumer electronic devices may not be capable or providing the power that the WNCE2001 requires. In such cases, the WNCE2001 may reset itself or turn itself off. When this happens, please use the WNCE2001 power adapter when powering up the WNCE2001. 2. When setting up the WNCE2001 without using WPS, does the computer have to be on DHCP for the installation to work? Yes. 3. I tried to install without WPS, but when I launched my browser, I got an error page. What can I do? Make sure that your Ethernet cable is fully seated between the WNCE2001 and the computer, and that the WNCE2001 LAN LED is on. If not, re-connect the Ethernet cable, and re-launch your Internet browser. 4. Why am I getting the error “Connection was not established to the selected network.”? There are a few reasons for this. First, you may have entered the incorrect network name or key. Make sure it is typed in correctly by clicking Cancel and re-typing the name and key. Second, the router may have stopped broadcasting. Make sure the router that is broadcasting your wireless network is still turned on and there is a clear line of sight between the WNCE2001 and the router. If possible, move the WNCE2001 closer to the router and click Try Again. If after repeated attempts to connect, you are still seeing this message, you may need to upgrade your router to one that provides greater wireless range, or purchase a Range Extender to extend its wireless range. 5. What should the LED colors be when the WNCE2001 is set up correctly? The Power and LAN LEDs should remain solid green. The WLAN LED should remain solid green or amber. 6. What should I do if the WLAN LED is red? The bes...