


Оценок - 0, средний балл: 0
(
 )
)
|
Фото и характеристики Acer K132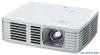 |


К этому устройству также есть другие инструкции:
Проекторы - K132 (2.44 mb)
Проекторы - K132 (1.36 mb)
Фрагмент инструкции
Acer Projector Series Quick Guide Original Issue: 8/2012 The Acer projector you have bought has integrated DLP and NVIDIA 3D (Optional) technology. If you have connected your projector to a computer, please read sections "Using NVIDIA 3D Vision technology" on page 3 or "Using DLP 3D / NVIDIA 3DTV Play technology" on page 7. If you have connected your projector to a DVD or Blu-ray player, please read "Watching 3D DVD or Blu-ray content" on page 11. Important: When you turn the 3D technology on, you will be shown a reminder that 3D is enabled. If you do not wish to view 3D content, you should turn it off, otherwise the image may not be projected at full brightness. Using 3D glasses NVIDIA 3D Vision and DLP 3D glasses are powered. In order to enhance battery life, they turn off after a few minutes of inactivity. Before you can view 3D content, you need to ensure the glasses are turned on. In many cases, there is a power switch on one of the arms that you can press, and an LED that indicates if the glasses are turned on or not. Note: Refer to the documentation that came with your glasses for instructions how to turn them on and how to change the battery. Using NVIDIA 3D Vision technology Only available with NVIDIA 3D Vision certified projectors when using NVIDIA 3D glasses. Before you can enjoy the benefits of the NVIDIA 3D Vision technology, you will need to do the following. 1Ensure your graphics card is supported. Please visit 3D_Vision_Requirements.html to see if your graphics card is listed. If you are unsure, there is an automatic tool at the top of the page that may help you. Important: Only NVIDIA graphics cards are supported. 2Download and install the 3D drivers and 3D player from 3You should also download a suitable 3D player such as the one available from Note: You may need to purchase additional software. 4Ensure you have the NVIDIA 3D glasses and IR-transmitter. Setting up a 3D environment Once you have installed the drivers, you will need to set up the environment. 1Position the infra-red transmitter so that it has maximum coverage. The transmitter controls the 3D glasses and is necessary to view 3D content. Plug the USB cable in to an available USB port on your computer. 2Right-click anywhere on the desktop and select NVIDIA Control Panel. This will open the setup Wizard if you haven’t previously set up the 3D environment. 3Follow the onscreen instructions to set up the 3D environment. 4Check the Enable Stereoscopic 3D option and select the correct display type. 5In the Select a task... list, select Change Resolution. Make sure the refresh rate of the display has been set to 100/120 Hz (from the appropriate drop- down menu). If you are viewing Blu-ray 3D content over an HDMI 1.4a or later connection, this will be set automatically. 6Press the menu button on the projector remote control to open the OSD. Select the 3D section (the sixth menu option) on t...
Эта инструкция также подходит к моделям:Проекторы - K135 (1.29 mb)
Проекторы - K335 (1.29 mb)
Проекторы - U5313W (1.29 mb)
Проекторы - X1163N (1.29 mb)