


Оценок - 4, средний балл: 3.8
(

 )
)
|
Фото и характеристики Canon SELPHY ES2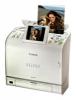 |


Фрагмент инструкции
PRINTEDINCHINA Preserve Your Memories with SELPHY You can easily edit and print family photos to preserve your precious memories, all with your SELPHY printer. Initial printing Things to Prepare Cartridge • Compact Power Adapter • • A Memory Card (Postcard size is used in Power Cord • this section.) Simple Steps for Basic Operations Printing images from the memory card using steps A through E. Protective paper Load the cartridge* Slide the cover lever up to open the cartridge cover Remove the cleaner unit Load the cartridge Close the cartridge cover * The ink and paper integrated cartridges for the SELPHY ES series are called Easy Photo Packs. Connect the printer to a power source and turn on the power To power outlet Ensure there is at least 15 cm (6 in.) of free space front and back, and at least 10 cm (4 in.) either side. 15 cm (6 in.) 15 cm (6 in.) 10 cm (4 in.) Insert the power cord to the compact power adapter and plug the other end into a power outlet Connect the compact power adapter to the printer Press until the power lamp lights green to turn on the power Set the display language ES2 ES20 Press and select [Printer Setup] with or , and press Select [Language] and press Press , , or to select the language you wish to set and press The selected language is set and the display returns to [Printer Setup]. Insert the memory card into the printer Open the card slot cover Insert a memory card into the appropriate card slot Images saved on the memory card are displayed on the LCD monitor. Compatible Memory Cards CF/microdrive Slot SD/miniSD/MMC+ Slot • CompactFlash Card • SD Memory Card • microSD Card* • Microdrive • miniSD Card • microSDHC Card* • xD-Picture Card* • SDHC Memory Card • MMCmobile Card* • miniSDHC Card • MMCmicro Card* MS/MS Duo Slot • MultiMediaCard • RS-MMC Card* • Memory Stick • MMCplus Card • Memory Stick PRO • HC MMCplus Card • Memory Stick Duo • Memory Stick PRO Duo • Memory Stick micro* * Card adapter required. For memory cards requiring an adapter, be sure to first insert the memory card into the adapter before inserting the adapter into the appropriate card slot. If you insert the memory card into a card slot without first inserting into an adapter, you may not be able to remove the memory card from the printer. Print ES2 ES20 Press , , or to select the image you wish to print Press or to select the number of copies to print Press Printing starts ES2’s Easy-Scroll Wheel You can also use the Easy-Scroll Wheel to select an image. How to print with the date Follow the instructions indicated below before selecting images. Press Select [Print Settings] in the menu screen and set the date Press or to select [Print Settings] and press . Press or to set [Date] to [On]. Press Date setting with [On] is saved. You can now select an image you wish to print with the date and print it. You can print an image taken with a camera only if you connect the camera to the printer with a USB cable. Print from Mobile Phones and Computers, as well as Digital Cameras, with Your SELPHY Printer Camera You can print without a cable from IrDA (infrared)*1 or Bluetooth*2 enabled mobile phones. *1 ES2 only. *2 Bluetooth Unit BU-20 (sold separately) is required. Compact Photo Printer Solution Disk (supplied CDROM) After installing the supplied software, you can use a USB cable to print images saved on your computer. You can also add text to the images before printing, and print a variety of layouts. For the details on how to use the software, refer to the Printer User Guide after installing it from the supplied CD-ROM. Installation instructions for the Printer User Guide are on page 12 of this guide. MobileComputer What You Can Do with Your SELPHY Printer Enjoy printing images with your SELPHY printer. Creative Print Add Frames Add Clip Art Stamps Create a Calendar Print a Picture Diary Add a Speech Bubble Create ID Photos Print a Movie Print with Effects (ES2 only) Print Settings Print the Date Print the Image Number Print after Correcting Red-Eye Print in Sepia, or Black and White Print after Adjusting the Brightness You can enlarge and print a portion of an image Add Borders to an Image Print after Selecting a Page Layout For the details on the functions of the printer, refer to the Printer User Guide after installing it from the supplied CD-ROM. Installation instructions for the Printer User Guide are on page 12 of this guide. Printer User Guide For details about the functions introduced in this book, refer to the Printer User Guide that is included in the supplied CD-ROM. The following topics are covered. -Usage details -Useful functions -Supplied software Installing the Printer User Guide * Adobe Reader is required to view the Printer User Guide. 1 Separately Sold Products Ink and paper integrated cartridge. The cartridge differs depending on the paper size and ink type. Please refer to the table below. Cartridge Paper Size Ink Type Name (Product No.) No. of Sheets Color of Cartridge Color Easy Photo Pack E...