


Оценок - 2, средний балл: 4
(

 )
)
|
Фото и характеристики Denon DN-C615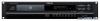 |


Фрагмент инструкции
!9REPEAT button • Press this to perform repeat playback. @0TIME button • The time display switches each time this button is pressed. • Normally “ELAPSED” appears on the time display and the current elapsed time is displayed. • When this button is pressed once, “REMAIN” appears on the time display and the remaining time for the current track is displayed. When pressed again, the remaining time to the end of the disc is displayed. @ 1 TITLE button • When the button is pressed, the text information (Disc title, or track artits) is displayed. • When the button is pressed mode with a disc containing an loaded, the file name is displayed. When pressed during playback, the display switches as shown below. Elapsed time of currently playing track File name of currently playing track Title name Artist name Album name @ 2 FOLDER button • When disc containing MP3 format files is loaded, in the stop mode press this button then the folder select mode is possible. @ 3 Headphones jack • For private listening, you can connect your headphones to this jack. (2) Rear panel q ANALOG OUT jacks • These are unbalanced outputs using RCA type jacks. The CD’s playback signals are output from these jacks. w DIGITAL OUT jack • This is an coaxial output using an RCA type jack. • Signal format : SPDIF or IEC-958 Type II e External synchronized control jacks (EXT. SYNC.) • Connect these for synchronized recording. r Cascade control jacks (CASCADE) • Connect these for continuous operation on multiple units. • When the cascade mode is set to “ON”, the start signal is output from this output jack once operation is finished. (Preset function) t RC IN control jack • This is a stereo mini jack for wired remote control. q CD transport indicator w Mode display portion FILE : This lights when the file name of MP3 is displayed. FOLDER : This lights in the folder selection mode. TITLE : This lights when the title in the MP3 ID3-Tag or CD Text is displayed. MP3 : This lights when a disc containing MP3 format file is loaded. PROG : This lights in the program mode. RAND : This lights in the random mode. REPEAT, 1 : This lights in the repeat mode. CASCADE : This lights in the cascade mode. (Preset function) ALBUM : This lights when the album name in the MP3 ID3-Tag is displayed. ARTIST : This lights when the artist name in the MP3 ID3-Tag is displayed. e CD pitch display r Playing position display • This indicates the current position within the track’s totalplaying time. • In the MP3 play mode, it may be unable to display correctly. t 20 tracks music calender • In the single track play mode, only the specified track lights. • In the continuous play mode, everything from the specified track to the last track lights. • Track numbers are displayed up to track 20. Track 21 and on are not displayed. • MP3 is not displayed. y Multiple display • This displays Track No. of CD, playing time of CD, various operational information, text message, etc. u Time mode indicator ELAPSED : This lights when the elapsed time is displayed. REMAIN : This lights when the remaining time is displayed. i Infrared remote control indicator o Play mode indicators • “SINGLE” lights when in the single track play mode. • “CONT.” lights when in the continuous play mode. ENGLISH (3) Display3 CONNECTIONS Leave your entire system other components have been 2 Connection precautions • Before proceeding with connections be sure to turn all system components off. • Ensure that all cables are connected properly • Insert plugs fully into the terminals. • Connect the CD output jacks to the amplifier 2 Remote control connections (RC IN) • For wired remote control, use the circuit shown on the • Design the circuit so that the wire resistance is 0.5 ./ohms or less. C1 . 1 N 6 Lch N 150 N 180 N 270 N 390 N 680 C2 C3 Rch GND N 150 N 180 Lch Rch GR L N 270 N 390 N 680 N 1.3k N 3.9k o3.5mm (“N” is the number of DN-C615 units connected.) • Up to six units can be controlled simultaneously with one remote control unit. • Wire the signal and ground lines as shown on the diagram below and connect at the remote control inputs (C1, C2 and C3). • Design the circuit so that the resistance of the individual wires is 0.5 ./ohms or less. 2 Installation precautions GND Stereo mini plug Connecting two DN-C615 units (N = 2) C1 C2 C3 DN-C615 1 DN-C615 2 Remote Unit • If the DN-C615 is placed near an amplifier, tuner or other components, noise (induced hum) or beat interference may result (especially during AM or FM reception). If this occurs, separate the DN-C615 from other components or reorient its position. NOTE: • Use this unit in a horizontal orientation. When the unit is used with the front panel facing upward (and the unit us in a vertical orientation) or when the front panel is on an incline, the unit will not operate properly. ENGLISH OPENING LOADING A Opening and closing the . . This operation only works while the 1. Press the power operation switch q to turn on the power. 2. Press the OPEN/CLOSE button e. H...