


Оценок - 4, средний балл: 4.3
(

 )
)
|
Фото и характеристики Sony MDX-C8970R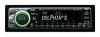 |


Фрагмент инструкции
Note on using MDs If you have drink holders near your audio equipment, be careful not to splash juice or other soft drinks onto the car audio and MDs. Sugary residues spilt on this unit or on the MDs may contaminate the unit and MDs, reduce the sound quality, or prevent sound reproduction altogether. Cleaning Wipe the surface of the MD cartridge from time to time with a soft dry cloth. Location of controls SEEK/AMSMODE OFF SOUND DSPL PTY LIST OPEN AF/TASOURCE SHIFT 1 2 3 4 5 6 7 8 9 10 TIR MDX-C8970R SA Refer to the pages for details. 1 SEEK/AMS (seek/Automatic Music Sensor/manual search/voice drive/voice memo select) control 10, 12, 13, 15, 20, 21, 22, 23, 25, 35, 36, 38, 41 2 MODE (band/unit select) button 14, 15, 34, 36, 40 3 SOURCE (TUNER/MD/CD) button 9, 14, 15, 18, 26, 27, 28, 29, 30, 34, 36, 40 4 Z (eject) button (located on the front side of the unit behind by the front panel) 9 5 Dial (volume/DSO level/equalizer level/ listening position/front or rear speaker volume/subwoofer volume/balance) 8, 19, 20, 25, 26, 27, 28, 29, 30, 31, 39, 40 Dial usually functions as a volume control except in some adjusting modes. 6 SOUND button 26, 27, 28, 29, 30, 31 7 DSPL/SA (display mode/spectrum analyzer change) button 10, 16, 17, 34, 35, 39, 40 8 Display window 9 Reset button (located on the front side of the unit behind by the front panel) 7 0 OPEN button 7, 9, 43 qa PTY/LIST button Disc Memo 39, 40 List-up 40 RDS Programme 22 qs AF/TA button 17, 18, 19 qd OFF button* 7, 9 qf Sensor for the optional wireless remote qg SHIFT button PLAY MODE 12, 13, 14, 15, 18, 19, 36, 37, 38, 41 REP 11, 36 SET UP 8, 10, 22, 33, 35 SHUF 11, 36 qh During radio reception: Number buttons 15, 18, 19 During CD/MD playback: Direct disc selection buttons 35, 36 qj TIR button 20, 21 * Warning when installing in a car without ACC (accessory) position on the ignition key switch Be sure to press (OFF) on the unit for two seconds to turn off the clock display after turned off the engine. When you press (OFF) momentarily, the clock display does not turn off and this causes battery wear. Location of controls Optional wireless remote (RM-X47) OFF SOURCE DIR SEL + FF – REW SOUND– + ATT DSPL SEEK AMS PRESET DISC MODE The buttons of the wireless remote have the same functions as those on the unit. 1 OFF button 2 SEEK/AMS button 3 buttons 4 ATT button 5 SOUND/SEL button 6 DSPL button 7 PRESET/DISC button You cannot do manual search and manual tuning with the remote. 8 SOURCE button 9 MODE/DIR button Getting Started Resetting the unit Before operating the unit for the first time or after replacing the car battery, you must reset the unit. Press the reset button with a pointed object, such as a ballpoint pen. Reset button Notes • Pressing the reset button will erase the clock and some memorised functions. • When you connect the power supply cord to the unit or reset the unit, wait for about 10 seconds before you insert a disc. If you insert a disc within these 10 seconds, the unit will not be reset, and you will have to press the reset button again. Detaching the front panel You can detach the front panel of this unit to protect the unit from being stolen. 1 Press (OFF). 2 Press (OPEN) to open up the front panel, then slide the front panel to the right side, and pull out from the left side of the front panel. 1 2 Notes • Do not place anything on the inner surface of the front panel. • Be sure not to drop the panel when detaching it from the unit. • If you detach the panel while the unit is still on, the power will be turned off automatically to prevent the speakers from being damaged. • When you carry the front panel with you, put it in the supplied front panel case. Attaching the front panel Place the hole in the front panel onto the spindle on the unit as illustrated, then push the left side in. x Notes • Be sure not to attach the front panel upside down. • Do not press the front panel hard against the unit when attaching it. Press it lightly against the unit. • Do not press hard or put excessive pressure on the display windows of the front panel. • Do not expose the front panel to direct sunlight or heat sources such as hot air ducts, and do not leave it in a humid place. Never leave it on the dashboard of a car parked in direct sunlight where there may be a considerable rise in temperature. Caution alarm If you turn the ignition key switch to the OFF position without removing the front panel, the caution alarm will beep for a few seconds. TIR indicator If you pull out the ignition key while the TIR function is on, the TIR indicator flashes a few times. TIR indicator For more information on the TIR function, refer to “Recording the traffic announcements” (page 20). Preparing the rotary commander When you mount the rotary commander, attach the labels as shown in the illustration below. Setting the clock The clock uses a 24-hour digital indication. Example: To set the clock to 10:08 1 Press (SHIFT), then press (3) (SET UP). 1 Press (5) (t). The hour...