


Оценок - 1, средний балл: 3
(

 )
)
|
Фото и характеристики Casio PX-135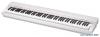 |


К этому устройству также есть другие инструкции:
Фрагмент инструкции
Pressing the damper pedal while playing will cause the notes you play to reverberate for a very long time. • When a GRAND PIANO tone (MODERN, CLASSIC, MELLOW, BRIGHT, VARIATION) is selected as the tone, pressing this pedal will cause notes to reverberate just like the damper pedal on an acoustic grand piano. Back DAMPER PEDAL jack SP-3 Pedal Connector You can connect the optionally available 3-Pedal Unit (SP-32) to the pedal connector on the bottom of the digital piano. You can then use the pedals for expression that is similar to that available on an acoustic piano. Bottom Pedal connector SP-32 Pedal Functions • Damper Pedal In addition to the damper pedal functions described in the column to the left, the SP-32 pedal also supports half-pedal operation, so pressing the pedal part way applies only a partial damper effect. • Soft Pedal Pressing this pedal suppresses notes played on the keyboard after the pedal was pressed, and makes them sound softer. • Sostenuto Pedal Only the notes that are played while this pedal are depressed are sustained until the pedal is released. Soft Pedal Damper Pedal Sostenuto Pedal NOTE • The optional CS-67P stand is required in order to use the SP-32 Pedal Unit. Bundled and Optional Accessories Use only accessories that are specified for use with this digital piano. Use of unauthorized accessories creates the risk of fire, electric shock, and personal injury. NOTE • You can get information about accessories that are sold separately for this product from the CASIO catalog available from your retailer, and from the CASIO website at the following URL. Playing with Different Tones Playing with Different Tones POWER VOLUME FUNCTION METRONOME SONG aGRAND PIANO Selecting and Playing a Tone The piano comes with 18 built-in tones. • The names of the tones are marked above the keyboard keys to which they are assigned. To select a tone 1. Press the POWER button. IMPORTANT! • When you turn on the digital piano, it performs a power up operation in order to initialize its system. During system initialization the tone button lamps cycle on and off in the sequence for about seven seconds to let you know that system initialization is in progress. 2. Select the tone you want. • To select GRAND PIANO (MODERN, CLASSIC, • To select one of the other tones MELLOW) • While holding down the FUNCTION button, • Press one of the GRAND PIANO buttons: press the keyboard key that corresponds to the MODERN, CLASSIC, MELLOW. tone you want to select. • The button lamp of the selected tone will light. English 3. Use the VOLUME controller to adjust the volume. E-7 Playing with Different Tones NOTE • Of the Digital Piano's 18 built-in tones, the first five are grand piano tone. Each tone has its own distinctive merits, so you should select the tone that suits the song you are playing along with or your own personal preferences. The MODERN, CLASSIC, and MELLOW tones are assigned to buttons for quick and easy selection. Tone Name Characteristics MODERN This tone provides a bright grand piano sound. The volume and timbre of this tone is quick to respond to different keyboard pressures, and it has relatively strong reverb. This tone is a good choice for dynamic and lively performances. CLASSIC This is a natural piano tone that closely resembles the sound of an acoustic grand piano. Reverb and other effects are kept to a minimum in order to enhance the impact of piano pedals operations (acoustic resonance), for musically delicate expressions. This tone is a good choice for lesson and practice sessions. MELLOW Warm and mellow piano tone BRIGHT Bright and clear piano tone VARIATION Piano tone optimized for playing along with accompaniment Bass Tones (BASS 1, BASS 2) Selecting either of the two BASS (LOWER) tones (1 or 2) in step 2 of the above procedure will assign the selected bass tone to the low range (left side) of the keyboard. The high range (right side) will be assigned the tone that was selected when you pressed the BASS 1 or BASS 2 key. • BASS 1 and BASS 2 let you effectively split the keyboard between two different tones. Split Point Low Range High Range BASS 1 PIPE ORGAN (Currently selected tone.) NOTE • To return the keyboard to a single tone, select any tone other than BASS 1 or BASS 2. • You cannot select BASS 1 or BASS 2 when recording to Track 2. To adjust the brilliance of a tone 1. While holding down the FUNCTION button, use the BRILLIANCE keys to specify a brilliance value in the range of –3 to 0 to 3. For this type of sound: Press this keyboard key: Mellower and softer • Brighter and harder • NOTE • To return a tone to its initial default setting “0”, press .. and .. at the same time. Playing with Different Tones Layering Two Tones Use the following procedure to layer two tones, so they sound at the same time. When specifying two tones for layering, first tone you select will be the main tone, while the second tone will be the layered tone. 1. While holding down the FUNCTION bu...