


Оценок - 5, средний балл: 3.8
(

 )
)
|
Фото и характеристики Casio CTK-810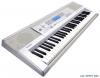 |


К этому устройству также есть другие инструкции:
Фрагмент инструкции
• In this case, a song volume screen will appear in place of the accompaniment volume screen. Keyboard Settings Using Touch Response When touch response is turned on, the relative volume of sound output by the keyboard is varied in accordance with the amount of pressure applied, just like an acoustic piano. Touch response provides a choice of three settings, described below. OFF: This setting turns off touch response. Keyboard pressure does not have any affect on the output notes. 1: This setting provides touch response that is suited for normal play. 2: This setting increases touch response, so stronger keyboard pressure has a greater effect than the “1” setting. 1 Press the TRANSPOSE/SETTING button until the TOUCH RESPONSE SELECT screen appears. Tuning the Keyboard Use the following procedure to fine tune the keyboard to match the tuning of another musical instrument. To tune the keyboard 1 Press the TRANSPOSE/SETTING button until the tuning screen appears. Tu n e 2 Use the [+], [–], and the number buttons to adjust the tuning value. Example: To lower tuning by 20 To u c h Tu n e 2 Use the [+] and [–] or [0] and [1] buttons to change the setting. Example: To select touch response 2. To u c h • Touch response is on when touch response indicator is on. Indicator appears • Touch response is off when touch response indicator is off. NOTE • Recording playback and accompaniment do not affect the touch response setting. NOTE • The keyboard can be tuned within a range of –50 cents to +50 cents. * 100 cents is equivalent to one semitone. • The default tuning setting is “00” when keyboard power is turned on. • If you leave the tuning screen on the display for about five seconds without doing anything, the screen is automatically cleared. • The tuning setting also affects playback from recorder and Auto Accompaniment. • To return the keyboard to its default tuning, perform the above procedure and press the [+] and [–] buttons at the same time in step 2. Connection to a Computer Connecting to a Computer The keyboard’s USB port makes it quick and simple to connect to a computer. After installing the USB MIDI driver onto your computer from the CD-ROM that comes with the keyboard, you will be able to use commercially available MIDI software on your computer to exchange data between the keyboard and your computer. To install the USB MIDI driver 1On the computer to which you plan to connect, install the USB MIDI driver that comes on the CDROM that comes bundled with the keyboard. • For information about installing the USB MIDI driver, see the “CASIO USB MIDI Driver User’s Guide” (manual_e.pdf) on the “USB Manual and Driver CDROM”. NOTE • Before starting actual installation of USB MIDI driver, be sure to read the contents of the “readme.txt” file in the “English” folder on the CD-ROM. • Use Adobe Reader or Acrobat Reader to access the USB MIDI driver user’s guide.* * You need to have Adobe Reader or Acrobat Reader installed on your computer in order to view the contents of the “CASIO USB MIDI Driver User ’s Guide” (manual_e.pdf). If your computer does not have either Adobe Reader or Acrobat Reader installed, use the procedure below to install it. Installing Adobe Reader (Acrobat Reader**) • Place the “USB Manual and Driver CD-ROM” into your computer’s CD-ROM drive. • On the CD-ROM, navigate to the folder named “Adobe”, open the folder named “English”, and then double-click “ar601enu.exe” (“ar505enu.exe”**). Follow the instructions that appear on your computer screen to install Adobe Reader. ** Adobe Reader cannot be installed on a computer running Windows 98. If your computer is running under Windows 98, double-click “ar505enu.exe” to install Acrobat Reader. TRANSPOSE/SETTING RIGHT/TRACK 2LEFT/TRACK 1 Number buttons [+] / [–] Minimum Computer system Requirements Supported Operating Systems Operation is supported under Windows® XP Professional, Windows® XP Home Edition, Windows® 2000 Professional, Windows® Me, Windows® 98SE, and Windows® 98. Universal • IBM AT or compatible computer • USB port that provides normal operation under Windows • CD-ROM drive (for installation) • At least 2MB of free hard disk space (not including space required for Adobe Reader) Windows XP • 300MHz or higher Pentium processor • At least 128MB of memory Windows 2000 • 166MHz or higher Pentium processor • At least 64MB of memory Windows Me, Windows 98SE, Windows 98 • 166MHz or higher Pentium processor • At least 32MB of memory NOTE • Company and product names used herein are trademarks of their respective owners. E-50 Connection to a Computer Using the USB port Note that you need to purchase a commercially available USB cable to connect the keyboard to a computer using the USB port. To connect to a computer using the USB port 1 Use a commercially available USB cable to connect the keyboard to the computer. DATA ACCESS Lamp • The DATA ACCESS lamp lights whenever the keyboard is exchanging data with a connected computer over a USB cable connectio...
Эта инструкция также подходит к моделям:Музыкальные инструменты - WK-110 (2.71 mb)