


Оценок - 3, средний балл: 3.7
(

 )
)
|
Фото и характеристики Clarion VMA573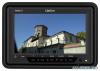 |


Фрагмент инструкции
20 4. INSTALLATION AND WIRING 4. INSTALLATION AND WIRING Read these instructions and the following precautions carefully. What is included in the box In addition to this manual, the box contains: • Either a 5.6” VMA573 or 7” VMA773 monitor unit with wiring harness • One 1.2M RCA A/V cable .. One power cable • One 25cm 3.5. Jack to RCA adaptor cable • Owner’s manual & Installation guide .. Bezel • Metal insert card 21 Before Starting Disconnect the minus(..) terminal on the vehicle’s battery. WARNING ! To prevent short circuits during installation, be sure to disconnect the battery. Precautions • This unit is exclusively for vehicles with a negative ground, 12V power supply. • Do not open the case. There are no user-serviceable parts inside. If you require assistance, consult your Clarion dealer or an authorized Clarion service center. • Use a soft, dry cloth to clean the screen. Never use a rough cloth, thinner, benzene, alcohol, or other solvent. The screen surface is easy to scratch-do not rub it when cleaning. • Always use great care when attaching anything to a vehicle! Visually inspect all sides of any potential screw location to ensure no damage will occur. WARNING ! NEVER install this monitor where it is visible from the driver’s seat, or where it could injure any vehicle occupant in case of an accident. Ensure that your installation does not create risk of head-strike injury, and that the monitor will remain securely mounted in the case of an accident or sudden maneuver. 22 Installing the monitor Flush mounting in the headrest You may use the included bezel to mount the monitor. 1. Ensure that you will have sufficient clearance for the monitor and its rear-located wiring harness. 2. Cut the opening. 3. Route the pigtail cable end of the wiring harness into the opening from the rear out the front. 4. Insert the bezel and route the wiring harness through the opening in the rear. 5. Firmly attach the bezel to the mounting surface and/or to the interior of the mounting surface. Mounting tabs Mounting screw holes Wire harness opening 23 Installing the monitor 6. Connect the wiring harness to the monitor, and tuck the excess wiring harness length carefully out of the way behind the bezel. Press edges to fit monitor into bezel , do not press monitor Spring clips to lock screen the monitor on its position 7. Gently insert the monitor into the bezel. Press only on the edges of the monitor, not on the screen. You should hear a few soft clicks as the monitor locks into place by four spring clips on the bezel. Bezel Monitor CAUTION ! NEVER press on the surface of the screen! Gently press on the edges of the monitor case. If you find that you can not insert the monitor without excessive force, you may need to check your wire harness position for interference with the insertion process. Your may also need make the opening slightly larger. 24 Installing the monitor Removing the monitor from the bezel To remove the monitor from the bezel, insert the metal insert card between the monitor case and the side of the bezel to release the spring clips. Insert the metal insert card to take monitor out of the bezel 25 Wiring the monitor Precautions • Disconnect the negative battery terminal before making any wiring connections. • Be particularly careful where you route wires. Keep them away from the engine, exhaust system, etc. Heat may damage wires. • If the fuse should blow, make sure all connections are correct and no wires are damaged before replacing the fuse. Always use fuses that are the same amperage value as the original. When replacing a fuse, never let the battery side touch any metal part or any other wire. WARNING ! Be sure to disconnect the battery (-) terminal before starting. This is to prevent short circuits during installation. Procedure 1. Disconnect the negative(-) lead from the vehicle’s battery. 2. Find a place in the vehicle for the video source(s). 26 Wiring the monitor 3. Create passage holes for the power and video cables. When drilling through metal or plastic, use grommets to protect the cables from sharp edges that could penetrate the insulation and cause a short circuit and device failure. 4. Connect the ground lead (black) securely to a clean metal plate on the vehicle. Use sand paper to remove any paint from the surface where you attach the ground terminal. 5. Reconnect the negative (-) lead to the battery. Monitor connections CAUTION ! Some non-Clarion automotive DVD and VCP source units use a similar connector for an external IR receiver, but use different pin polarity than the Clarion uses. Connecting non-Clarion source equipment to this connector could cause equipment damage not covered by the warranty! IR connector polarity : PLASTIC COVER This 3.5. IR Jack has plastic cover to prevent short, to remove the plastic cover, please do not pull it out directly, please rotate the plastic cover and put it out slowly. 27 Connections diagram 28 5. TROUBLESHOOTING 5. TROUBLESHOOTING The system doe...
Эта инструкция также подходит к моделям:Мониторы - VMA773 (695.19 kb)