


Оценок - 3, средний балл: 3.7
(

 )
)
|
Фото и характеристики American Audio CK-1000 MP3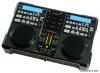 |


Фрагмент инструкции
23. AUX INPUT - This Aux input is for the use of a Mp3 player. Input volume will be controlled by the channel two fader. 24. Channel Gain Control - This adjustment is used to adjust an audio source signal input gain for a channel. Never use the gain control to adjust output volume. Setting the gain level properly will ensure a clean output signal. To properly set the gain level controls: 1. Be sure the Master Volume Con- trol (33) is set to level 4. 2. Set the Channel Fader (27) to level 8. 3. Begin playback on an audio source con nected to the channel you are adjusting. 4. Use the Gain Control (24) to adjust an average output volume of +4 dB. 5. Repeat this step for all channels. 25. Channel Equalizer - All of the channels include a three-band signal EQ. These controls are used to increase or decrease the LOW’s, MID’s, and HI’s of the output signal. CHANNEL treble control - This knob is used to adjust the treble levels of a channel allowing for a maximum treble gain of +12dB or maximum decrease of -30dB. Turning the knob in a counter-clockwise direction will decrease the amount of treble applied to a channel signal, turning the knob in a clockwise direction will increase the amount of treble applied to a channel signal. CHANNEL midrange control - This knob is used to adjust the midrange levels of a channel allowing for a maximum midrange gain of +12dB or maximum decrease of -30dB. Turning the knob in a counter-clockwise direction will decrease the amount of midrange applied to a channel signal, turning the knob in a clockwise direction will increase the amount of midrange ©American Audio® - - CK 1000Mp3 Instruction Manual Page 12 applied to a channel signal. CHANNEL BASS control - This knob is used to adjust the low frequency levels of a channel allowing for a maximum bass gain of +12dB or maximum signal decrease of -30dB. Turning the knob in a counter-clockwise direction will decrease the amount of bass applied to a channel signal, turning the knob in a clockwise direction will increase the amount of bass applied to a channel signal. 26. MASTER VOLUME LEVEL INDICATORS - The dual MASTER LEVEL LED indicators are used to detail the master output level. The meters will detail the output level of both the left and right channels. 27. Channel Fader - These faders are used to control the output signal of any source assigned to its particular channel. 28. RELAY BUTTON - This button activates the FLIP-FLOP™ function. 29. Q-Start ON/OFF Switch - With this function you can use the crossfader to start and stop the CD play. The ON/OFF “Q” START switch activates the fader “Q” start feature. When the fader “Q” start feature is activated sliding the CROSSFADER (30) from left to right will play or cue the CD player connected. Example: Be sure the Fader “Q” Start feature is activated on both channels. Slide the crossfader to the channel one position (full left) and begin playback on CD drive one. Slide the crossfader to the channel position (far right). This will im- mediately trigger the play function on CD drive two and return CD drive one to cue mode. To return to normal fader operation turn the Fader “Q” Start ON/OFF SWITCH to the OFF position. 30. replaceable Crossfader - This fader is used to blend the output signals of channels one and two together. When the fader is in the full left position (channel 1), the output signal of channel one will be controlled by the master volume level. The same fundamentals will apply for channel two. Sliding the fader from one position to another will vary the output signals of channels one and two respectively. When the crossfader is set in the center position, the output signals of both the channels one and channels two will be even. 31. cue mix - This knob is used send a channels incoming signal to the headphones. Turn the knob counter-clockwise to monitor Channel 1, and clockwise to monitor Channel 2. The cue level is adjusted by the Cue Level volume Knob (32). Be sure the cue level is set to minimum before putting a pair of headphones on. 32. Cue Level Volume knob - This knob is used to adjusts the headphone volume output level. Turn the knob in a clockwise direction to increase the headphone volume. 33. Master Volume Control - This rotary knob is used to control the master output level (volume). To avoid distorted output try to maintain an average output signal level +4 dB. Be sure this volume control is always set to zero before turning the unit on. 34. Microphone Volume - This knob is used to regulate the microphone output volume. Turning the knob in a clockwise direction will increase the volume level. GENERAL Functions and controls (Cont.) Mixer ©American Audio® - - CK 1000Mp3 Instruction Manual Page 13 GENERAL Functions and controls (Cont.) front & back panel Figure 4 36 34 35 Figure 5 45 44 43 40 39 38 37 41 42 46 B. FRONT PANEL (FIGURE 4) 34. Transport Tray 1 - This tray is used to load and unload a compact disc. The tray is open...