


Оценок - 0, средний балл: 0
(
 )
)
|
Фото и характеристики Nikon 12-24mm f/4G ED-IF AF-S DX Zoom-Nikkor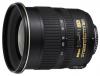 |


Фрагмент инструкции
............ ................ .................... ................ ................................... .... .......................... ......................... ............................ .... .... .... .... English Deutsch Francais Introduction Thank you for purchasing the AF-S DX Zoom-Nikkor ED 12-24mm f/4G IF. Optical performance of DX Nikkor lenses is optimized for the Nikon D2-Series, D1-Series, D100 and D70 by reducing the size of the image circle as compared with normal 35mm lenses. This results in lenses with reduced weight and more compact size for much easier handling. •DX Nikkor lenses are specially designed for use with Nikon Digital SLR cameras (Nikon DX format). These lenses can be attached to film-based 35mm SLRs, but will not work properly due to the reduced size of the image circle. Before using this lens, please read these instructions and the notes on safety operations in your camera’s instruction manual. Also, keep this manual handy for future reference. Major features • This is a high-grade, internal focusing (IF) lens employing a Silent Wave Motor to drive the focusing mechanism, thus the “S” designation. As a result, autofocusing is smooth, silent, and almost instantaneous. • Autofocus (A) or manual (M) mode can easily be selected with the focus mode switch. • Autofocusing with manual override is provided, allowing instant change from autofocusing to manual focusing. • More accurate exposure control is possible when this is mounted on a Nikon camera having 3D Matrix Metering capability, because subject distance information is transferred from the lens to the camera body. • The use of three aspherical and two ED (extra-low dispersion) lens elements ensures sharp pictures virtually free of color fringing. Also, by utilizing a 7-blade diaphragm that produces a nearly circular aperture, out-of-focus images in front of or behind the subject are rendered as pleasing blurs. • Closest focusing distance of 0.3m (1 ft.) is provided at all zoom settings. Focusing, zooming, and depth of field First turn the zoom ring until the desired composition is framed in the viewfinder before focusing. If your camera has a depth of field preview (stop-down) button or lever, depth of field can be observed while looking through the camera viewfinder. Setting the aperture Because this lens does not have an aperture ring, you must set the aperture on the camera body. Focusing Set your camera’s focus mode selector according to this chart: Autofocus with manual override (M/A mode) 1 Set the focus mode switch to M/A. (Fig. B) 2 Autofocus is provided, but you can manually override the focus by operating the separate focus ring while lightly depressing the shutter release button or AF start (AF-ON) button on the camera body of cameras so equipped. 3 Remove your finger then press the shutter release button lightly or the AF start button once again to cancel manual focus and resume autofocus. Getting good results with autofocus Refer to “Notes on using wide or super-wide angle AF Nikkor lenses” on the back of this sheet. Taking flash pictures with cameras having built-in flash When using the following camera, check the focal length and shooting distance before taking flash pictures to prevent vignetting since the light emitted from the flash may be obstructed by the lens barrel. Using bayonet hood HB-23 Attaching the hood Align the lens hood attachment index ( ) on the hood with the lens hood mounting index on the lens, and turn the hood counterclockwise (as viewed from the camera side) until it click stops. (Fig. A) • Make sure that the lens hood mounting index aligns with the lens hood setting index ( ). • If the lens hood is not correctly attached, vignetting can occur. • To facilitate attachment or removal of the hood, hold it by its base rather than its outer edge. • To store the lens hood, attach it in the reverse position. Detaching the hood While holding its base rather than its outer edge, turn the hood clockwise as viewed from the camera side to detach. Lens care • Be careful not to soil or damage the CPU contacts. • Clean the lens surfaces with a blower brush. To remove dirt and smudges, use a soft, clean cotton cloth or lens tissue moistened with ethanol (alcohol) or lens cleaner. Wipe in a circular motion from center to outer edge, taking care not to leave traces or touch other parts of the lens. • Never use thinner or benzene to clean the lens as this might damage it, result in a fire, or cause health problems. • To protect the front lens element, an NC filter is recommended at all times. A lens hood also helps protect the front of the lens. • When storing the lens in its lens case, attach both front and rear caps. • When the lens will not be used for a long time, store it in a cool, dry place to prevent mold. Also store the lens away from direct sunlight or chemicals such as camphor or naphthalene. • Do not get water on the lens or drop it in water as this will cause it to rust and malfunction. • Rein...