


Оценок - 0, средний балл: 0
(
 )
)
|
Фото и характеристики Olympus PT-EP10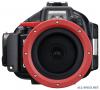 |


К этому устройству также есть другие инструкции:
Фрагмент инструкции
20 Applying grease to the O-ring .............................................................................................. 21 Replace consumable products ............................................................................................. 21 EN 4 8.Appendix ..............................................................................................................22 Specifications ....................................................................................................................... 22 Supplied accessories for PT-EP10 ................................................................................ 22 Optional accessories...................................................................................................... 22 EN EN 5 1. Preparations Check the contents of the package Check that all accessories are in the box. Contact your dealer if accessories are missing or damaged. • LCD hood (on the body) • Case body (Check that the O-ring is installed.) • Silica gel (1g) • Body cap • Silicone grease • O-ring remover • Hand strap EN • Optical fiber cable • Flash window cover • Diffuser insertion slot cap (2) • Instruction manual (this manual) CAUTION: • After purchase, be sure to do maintenance even in brand-new condition. Neglecting the maintenance may become the cause of water leakage. For how to maintenance the case, refer to P.20. EN 6 EN 7 EN Names of the parts Note: Case operation parts marked by * corresponds to the operation parts of the digital camera. When the operation parts of the Case are operated, the corresponding functions of the digital camera will operate. For details of the functions, refer to the instruction manual for the digital camera. 1 Open/close dial 2 Slide lock *3 Shutter lever *4 ON/OFF button 5 Accessory mount 6 Optical fiber cable insertion slots 7 Zoom dial *8 q (Play) button *9 (Erase) button *0 Mode dial knob *a G/Fn button *b U button *c ( (REC) button *d INFO (Info display) button *e F (Exposure correction) button/Cross-cursor button .. *f # button/Cross-cursor button .. *g OK button *h jY button/Cross-cursor button .. *i MENU button *jP button/Cross-cursor button .. k LCD monitor window l LCD hood m O-ring n LCD inner hood o Tripod seat Using the accesories Installing and removing of the LCD hood Installation Fit the LCD hood as shown in the figure into the rails above and below the LCD monitor window one after the other. Removal Remove the LCD hood from the rails above and below the LCD monitor window one after the other by widening the LCD hood. Rails Installation Removal Mounting and removing the body cap Install to fit the concave and convex parts of the body cap and lens port. Be sure to remove the body cap before shooting. EN EN 8 Installing the diffuser 1 Attach the diffuser to the port adapter. Port adapter Diffuser 2 Attach the hand strap on the Case body. 3 Install the diffuser on the Case. EN EN 9 2. Advance check of the Case Advance check before use This Case has been the subject of thorough quality control for the parts during the manufacturing process and thorough function inspections during the assembly. In addition, a water pressure test is performed with a water pressure tester for all products to confirm that the performance conforms to the specifications. However, depending on the carrying, storage conditions and the maintenance status, etc., the waterproof function may be damaged. Before using, always perform the following advance checks. Advance check 1 Before loading the digital camera in the Case, immerse the empty Case to confirm that there is no water leakage. When it is difficult, water leakage can be checked by referring “Water leakage test” (P. 15). 2 Main causes of water leakage are as follows. • Forgetting to install the O-ring • Part of an O-ring or an entire O-ring is outside the specified groove. • O-ring damage, cracks, deterioration or deformation • Sand, fibers, hair or other foreign matter sticking to the O-ring, the O-ring groove or the O-ring contact surface. • Damage to an O-ring groove or O-ring contact surface. • Attached strap or silica gel getting caught when closing the Case. Perform the test after the above causes have been eliminated. CAUTION: If the advance test should show water leakage with normal handling, stop using the Case and contact your dealer or an Olympus service station. EN EN 10 3. Loading the digital camera Check the digital camera Check the digital camera before loading it in the Case. 1. Battery confirmation It is impossible to change the batteries when using the Case. Make sure that you have sufficient remaining battery capacity before use. 2. Check the remaining number of pictures Check that the image storage medium has enough room for the number of pictures you want to take. 3. Remove the strap, lens cap and filter from the digital camera. If the digital camera is loaded without removing the strap, lens cap and the Case cannot be sealed properly and water leakage may be cau...
Эта инструкция также подходит к моделям:Фотоаппараты - PT‑EP10 (1.85 mb)