


Оценок - 0, средний балл: 0
(
 )
)
|
Фото и характеристики Olympus XZ-1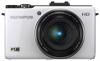 |


К этому устройству также есть другие инструкции:
Фрагмент инструкции
38) G(down) / jY (sequential shooting/Self-timer) button (p. 38) / Dbutton (erase) (p. 25) H(left) / & (macro) button (p. 36) / P(AF target) button (p. 37) I(right) / # (flash) button (p. 37) Abutton (p. 4, 5) The symbols FGHIdisplayed for image selections and settings indicate that the wheel controller (see above) is to be used. Single Print More Print 4/301010 ’11/02/26’11/02/26100-0004100-0004 12:3012:30 Y M D T me 2011Y/M/D0226..1230XCancel Set Operation guides displayed at the bottom of the screen indicate that the mbutton, Abutton, or zoom lever should be used. 44 Erase/Cancel 4/30 Set Operation guide Reset Photo Mode Picture Mode WB XWSettings Flash Settings Bracket Settings Digital Zoom Image Stabilizer Natural Auto Off On Camera Menu 1/2 Exit Set Operation guide Wheel controller F(up) / F(exposure compensation) button (p. 38) G(down) / jY (sequential shooting/Self-timer) button (p. 38) / Dbutton (erase) (p. 25) H(left) / & (macro) button (p. 36) / P(AF target) button (p. 37) I(right) / # (flash) button (p. 37) Abutton (p. 4, 5) The symbols FGHIdisplayed for image selections and settings indicate that the wheel controller (see above) is to be used. Single Print More Print 4/301010 ’11/02/26’11/02/26100-0004100-0004 12:3012:30 Y M D T me 2011Y/M/D0226..1230XCancel Set Operation guides displayed at the bottom of the screen indicate that the mbutton, Abutton, or zoom lever should be used. 44 Erase/Cancel 4/30 Set Operation guide Reset Photo Mode Picture Mode WB XWSettings Flash Settings Bracket Settings Digital Zoom Image Stabilizer Natural Auto Off On Camera Menu 1/2 Exit Set Operation guide 4 EN Using the Live ControlUsing the Live Control To display the live control, press Aduring shooting. The live control can be used to adjust shooting functions while previewing their effects in the monitor. The live control is not displayed in Amode. See “Menus for Shooting Functions” (p. 7) for a list of the functions that can be adjusted. P AUTOWBAUTO WB WB AutoWB Auto L N h4:3 AUTOISOAUTO ISO AUTOWBAUTO WB HD Live control display Functions Options 1 Press Ato display the live control. 2 Use FGto select a function and HI to highlight options, then press A to choose the highlighted option. The highlighted option takes effect when Ais pressed or if no operations are performed for a short time. Some menu items may not be available at certain combinations of settings or in some shooting modes. . P AUTOWBAUTO WB WB AutoWB Auto L N h4:3 AUTOISOAUTOISO AUTOWBAUTO WB HD Cursor Name of currently selected item Cursor Using the Live ControlUsing the Live Control To display the live control, press Aduring shooting. The live control can be used to adjust shooting functions while previewing their effects in the monitor. The live control is not displayed in Amode. See “Menus for Shooting Functions” (p. 7) for a list of the functions that can be adjusted. P AUTOWBAUTO WB WB AutoWB Auto L N h4:3 AUTOISOAUTO ISO AUTOWBAUTO WB HD Live control display Functions Options 1 Press Ato display the live control. 2 Use FGto select a function and HI to highlight options, then press A to choose the highlighted option. The highlighted option takes effect when Ais pressed or if no operations are performed for a short time. Some menu items may not be available at certain combinations of settings or in some shooting modes. . P AUTOWBAUTO WB WB AutoWB Auto L N h4:3 AUTOISOAUTOISO AUTOWBAUTO WB HD Cursor Name of currently selected item Cursor EN 5 1 Press the mbutton. The menus are displayed. Reset Photo Mode Picture Mode WB XWSettings Flash Settings Bracket Settings Digital Zoom Image Stabilizer Natural Auto Off On Camera Menu 1/2 Exit Set 2 Press Hto highlight the page tabs. Use FG to select the desired page tab and press I. Custom Mode Setup Format Backup USB Connection qPower On Sound Settings File Name Pixel Mapping Storage Ye s Reset Setup Menu 1/2 Exit Set Custom Mode Setup Format Backup USB Connection qPower On Sound Settings File Name Pixel Mapping Storage Yes Reset Setup Menu 1/2 Exit Set Page tab Submenu 1 . 3 Use FGto select the desired option in submenu 1 and then press A. 3 min Setup Menu 2/2 sTV Out Sleep XWorld Time Exit Set WEnglish --.--.-- --:-20 sec 1 min 3 min 5 min sTV Out Sleep WXWorld Time Setup Menu 2/2 Back Set Submenu 2 4 Use FGto select the desired option in submenu 2 and then press A. Once a setting is selected, the display returns to the previous screen. There may be additional operations. “Menu Settings” (p. 45 to 63) 1 min Setup Menu 2/2 sTV Out Sleep Exit Set World Time WXEnglish --.--.-- --:-5 Press the mbutton to complete the setting. . Press the m button during shooting or playback to display the menus. The menus provide access to a variety of shooting and playback functions as well as to other camera settings, including display options and the time and date. Using the MenusUsing the Menus The menus can be used to adjust a variety of settings. 1 Press the mbutton. The menus are displayed. Reset Photo Mode Pict...
Эта инструкция также подходит к моделям:Фотоаппараты - XZ‑1 (3 mb)