


Оценок - 0, средний балл: 0
(
 )
)
|
Фото и характеристики Olympus TG-620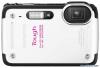 |


К этому устройству также есть другие инструкции:
Фрагмент инструкции
Double-click the CD-ROM (OLYMPUS Setup) icon to open the “OLYMPUS Setup” window and then double-click “Launcher.exe”. If a “User Account Control” dialog is displayed, click “Yes” or “Continue”. 2 Register your Olympus product. . Click the “Registration” button and follow the on- screen instructions. To register the camera must be connected to the computer. “Connecting the camera” (p. 13) If nothing is displayed on the camera screen even after connecting the camera to the computer, the battery may be exhausted. Charge the battery and then connect the camera again. 3 Install OLYMPUS Viewer 2 and [ib] computer software. . Check the system requirements before beginning installation. . Click the “OLYMPUS Viewer 2” or “OLYMPUS ib” button and follow the on-screen instructions to install the software. OLYMPUS Viewer 2 Operating Windows XP (Service Pack 2 or later) / System Windows Vista / Windows 7 Pentium 4 1.3 GHz or better (Core 2 Duo Processor 2.13 GHz or better required for movies) 1 GB or more (2 GB or more RAM recommended) Free Hard 1 GB or more Drive Space 1024 . 768 pixels or more Monitor Minimum 65,536 colors (16,770,000 Settings colors recommended) 14 EN [ib] Operating System Processor RAM Free Hard Drive Space Monitor Settings Graphics Windows XP (Service Pack 2 or later) / Windows Vista / Windows 7 Pentium 4 1.3 GHz or better (Core 2 Duo 2.13 GHz or better required for movies) 512 MB or more (1 GB or more recommended) (1 GB or more required for movies — 2 GB or more recommended) 1 GB or more 1024 . 768 pixels or more Minimum 65,536 colors (16,770,000 colors recommended) A minimum of 64 MB video RAM with DirectX 9 or later. * See online help for information on using the software. 4 Install the camera manual. . Click the “Camera Instruction Manual” button and follow the on-screen instructions. Macintosh 1 Insert the supplied CD in a CD-ROM drive. . Double-click the CD (OLYMPUS Setup) icon on the desktop. . Double-click the “Setup” icon to display the “Setup” dialog. 2 Install OLYMPUS Viewer 2. . Check the system requirements before beginning installation. . Click the “OLYMPUS Viewer 2” button and follow the on-screen instructions to install the software. You can register via “Registration” in OLYMPUS Viewer 2 “Help”. OLYMPUS Viewer 2 Operating System Processor RAM Free Hard Drive Space 1024 . 768 pixels or more Monitor Minimum 32,000 colors (16,770,000 Settings colors recommended) * Other languages can be selected from the language combo box. For information on using the software, see online help. 3 Copy the camera manual. . Click the “Camera Instruction Manual” button to open the folder containing the camera manuals. Copy the manual for your language to the computer. Mac OS X v10.4.11–v10.6 Intel Core Solo/Duo 1.5 GHz or better 1 GB or more (2 GB or more recommended) 1 GB or more EN 15 Language, date, time, and time zone You can also choose the language for the menus and messages displayed in the monitor. The date and time set here are saved to image file names, date prints, and other data. 1 Press the nbutton to turn on the camera, use FGHIto select your language and press the Abutton. The menus can be used to change the selected language. [l] (p. 51) 2 Use FGto select the year for [Y]. XMENUBack Y/M/D Y M D Time :..2012 Date and time setting screen 3 Press Ito save the setting for [Y]. XMENUBack Y/M/D Y M D Time --:..2012 4 As in Steps 2 and 3, use FGHIto set [M] (month), [D] (day), [Time] (hours and minutes), and [Y/M/D] (date order), and then press the Abutton. For precise time setting, press the Abutton as the time signal strikes 00 seconds. To change the date and time, adjust the setting from the menu. [X] (Date/time) (p. 51) 5 Use HIto select the [x] time zone and then press the Abutton. . Use FGto turn daylight saving time ([Summer]) on or off. MENU’12.02.26 12:30 Back Summer SeoulTokyo The menus can be used to change the selected time zone. [World Time] (p. 51) 16 EN Shooting, Playbac Shooting, PlaybacShooting, Playbac Shooting, PlaybacShooting, Playbac k, and Er asing Shooting with the optimum aperture value and shutter speed (Pmode) In this mode, automatic shooting settings are activated while also allowing changes to a wide range of other shooting menu functions, such as exposure compensation, white balance, etc. as needed. The default settings of the function are highlighted in . 1 Press the nbutton to turn on the camera. Pmode indicator 00:3400:34 PP 0.00.0 AUTOWBAUTO WB AUTOISOAUTO ISO 12M 44 NORM Number of storable still pictures (p. 67) Monitor (standby mode screen) If Pmode is not displayed, press Hto display the function menu screen and then set the shooting mode to P. “Using the Menu” (p. 8) Current shooting mode display 2Hold the camera and compose the shot. Monitor Horizontal grip Vertical grip When holding the camera, take care not to cover the flash and microphone with your fingers, etc. 3 Press the shutter button halfway down to focus on the subject. . When the camera focuses on...
Эта инструкция также подходит к моделям:Фотоаппараты - TG-820 (2.81 mb)
Фотоаппараты - TG‑620 (2.81 mb)
Фотоаппараты - TG‑820 (2.81 mb)