


Оценок - 0, средний балл: 0
(
 )
)
|
Фото и характеристики Olympus SZ-15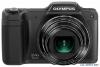 |


К этому устройству также есть другие инструкции:
Фрагмент инструкции
768 pixels or more Minimum 65,536 colors (16,770,000 colors recommended) . See online help for information on using the software. 44 EN 4 Install the camera manual. . Click the “Camera Instruction Manual” button and follow the on-screen instructions. Macintosh 1 Insert the supplied CD in a CDROM drive. . Double-click the CD (OLYMPUS Setup) icon on the desktop. . Double-click the “Setup” icon to display the “Setup” dialog. 2 Install OLYMPUS Viewer 3. . Check the system requirements before beginning installation. . Click the “OLYMPUS Viewer 3” button and follow the on-screen instructions to install the software. . You can register via “Registration” in OLYMPUS Viewer 3 “Help”. OLYMPUS Viewer 3 Operating System Processor RAM Free Hard Drive Space Monitor Settings Mac OS X v10.5–v10.8 Intel Core Solo/Duo 1.5 GHz or better (Core 2 Duo 2 GHz or better required for movies) 1 GB or more (2 GB or more recommended) 3 GB or more 1024 . 768 pixels or more Minimum 32,000 colors (16,770,000 colors recommended) . Other languages can be selected from the language combo box. For information on using the software, see online help. 3 Copy the camera manual. . Click the “Camera Instruction Manual” button to open the folder containing the camera manuals. Copy the manual for your language to the computer. EN 45 Direct printing (PictBridge) By connecting the camera to a PictBridge-compatible printer, you can print images directly without using a computer. To find out if your printer supports PictBridge, refer to the printer’s instruction manual. . The printing modes, paper sizes, and other parameters that can be set with the camera vary depending on the printer that is used. For details, refer to the printer’s instruction manual. . For details on the available paper types, loading paper, and installing ink cassettes, refer to the printer’s instruction manual. . In the setup menu, set [USB Connection] to [Print]. [USB Connection] (p. 37) Printing images at the printer’s standard settings [Easy Print] 1 Display the image to be printed onthe monitor. . “Viewing images” (p. 16) 2 Turn on the printer, and then connect the printer and camera. USB cable (supplied) Connector cover Multi-connector I(right) 3 Press Ito start printing. 4 To print another image, use HI to select an image, and press theAbutton. To exit printing After a selected image is displayed on the screen, disconnect the USB cable from the camera and printer. 46 EN Changing the printer’s settings for printing [Custom Print] 1 Display the image to be printed onthe monitor. . “Viewing images” (p. 16) 2 Turn on the printer, and then connect the printer and camera. 3 Press the Abutton. 4 Use FGto select the print mode, and press the Abutton. Submenu 2 Application Print This prints the image selected in Step 8. All Print This prints all images stored in the internal memory or card. Multi Print This prints one image in a multiple layout format. All Index This prints an index of all images stored in the internal memory or card. Print Order*1 This prints images based on the print reservation data on the card. *1 [Print Order] is available only when print reservations have been made. “Print Reservations” (p. 49) 5 Use FGto select [Size] (Submenu 3), and press I. . If the [Printpaper] screen is not displayed, the [Size], [Borderless], and [Pics/Sheet] are set to the printer’s standard. 6 Use FGto select the [Borderless] or [Pics/Sheet] settings, and press the Abutton. Submenu 4 Application Off/ On*1 The image is printed with a border around it ([Off]). The image is printed to fi ll the entire paper ([On]). (The number of images per sheet varies depending on the printer.) The number of images per sheet ([Pics/Sheet]) is selectable only when [Multi Print] is selected in Step 4. *1 The available settings for [Borderless] vary depending on the printer. If [Standard] is selected in Steps 5 and 6, the image is printed at the printer’s standard settings. EN 47 7 Use HIto select an image. 8 Press Fto make a printreservation for the current image. Press Gto make the detailed printer settings for the currentimage. To make the detailed printer settings 1 Use FGHIto select the setting, and press the Abutton. Submenu 5 Submenu 6 Application