


Оценок - 2, средний балл: 4
(

 )
)
|
Фото и характеристики Canon PowerShot TX1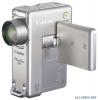 |


К этому устройству также есть другие инструкции:
Фрагмент инструкции
83 Transfer Order p. 110 Set Movie button p. 100 Transition p. 84 Print Menu Menu Item Page Print p. 106 Select Images & Qty. Select by Date Select by Category Menu Item Page Select by Folder p. 106 Select All Images Clear All Selections Print Settings * Default setting Set up Menu Menu Item Mute Volume Start-up Vol. Operation Vol. Selftimer Vol. Shutter Volume Playback Vol. Audio Mic Level Level Wind Filter LCD Brightness Power Saving Auto Power Down Display Off Options On/Off* Off/1/2*/3/4/5 Auto*/Manual -40 to 0 dB On/Off* -7 to 0* to +7 On*/Off 10 sec./20 sec./ 30 sec./1 min.*/ 2 min./3min. Page/Topic Set to [On] to silence all sounds except warning sounds. (Basic p. 11) Adjusts the volume of the start-up sound, operation sound, self-timer sound, shutter sound and playback sound. The volume cannot be adjusted if [Mute] is set to [On]. Adjusts the volume of the start-up sound when the camera is turned on. Adjusts the volume of the operation sound that plays when any button other than the shutter button is pressed. Adjusts the volume of the self-timer sound played 2 sec. before the shutter is released. Adjusts the volume of the sound played when the shutter releases. The shutter sound does not play when a movie is recording. Adjusts the playback volume of movies, sound memos or recorded sounds. p. 43 Sets method of adjustment for the sound recording level. Sets the sound recording level. Reduces wind noise. Press the Multi Controller or to adjust the brightness. You can check the brightness in the LCD monitor while you are adjusting the setting. p. 18 Sets whether or not the camera automatically powers down after a set period of time elapses without the camera being operated. Sets the length of time before the LCD monitor turns off when no camera operation is performed. Before Using the Camera— Basic Operations 25 Time Zone Date/Time Clock Display Format File Numbering Create Folder Create New Folder Auto Create Auto Rotate Distance Units Lens Retract Language Video System Print Method Reset All Home*/World p. 19 Basic Guide p. 10 0–10*1 sec./20 sec./30 sec./1 min./2 min./3 min. p. 13 You can also set it to perform a low level format (p. 28). Continuous*/ Auto Reset p. 72 p. 70 Check mark (On)/ No check mark (Off) Creates a folder for the next shooting session. Off*/Daily/ Monday–Sunday/ Monthly You can also set the Auto Create time. On*/Off p. 69 m/cm*/ ft/in Sets the units displayed for AF range distance (Basic Guide p. 15). 1 min.*/0 sec. Sets the timing of the lens retraction when you switch from the shooting to the playback mode. Basic Guide p. 10 NTSC/PAL p. 101 Auto*/ See below. *2 p. 27 *1 Default setting is 5 seconds. *2 You can change the printer connection method. There is usually no need to change the settings, but select when you print an image recorded in the (Widescreen) mode at the full page setting for wide paper using a Canon SELPHY CP730/CP720/CP710/CP510 Compact Photo Printer. Since this setting is saved even when the power is turned off, ensure that you return the setting to [Auto] to print other image sizes. (However, it cannot be changed while the printer is connected.) * Default setting My Camera Menu Menu Item Available Settings Page Theme Selects a common theme for each My Camera settings item. p. 112 Start-up Image Sets the image displayed when the camera power is turned on. Start-up Sound Sets the sound played when the camera power is turned on. Operation Sound Sets the sound played when any button other than the shutter button is pressed. Selftimer Sound Sets the sound played 2 seconds before the shutter releases in self-timer mode. Shutter Sound Sets the sound played when the shutter button is pressed. There is no shutter sound for movies. My Camera Menu Contents (Off)/ */ / Resetting Settings to Their Default Values 1 (Set up) Menu [Reset All]. See Menus and Settings (p. 22). 2 Select [OK] and press . • Settings cannot be reset when the camera is connected to a Before Using the Camera— Basic Operations computer or to a printer. • The following cannot be reset. -Shooting mode -The [Time Zone], [Date/Time], [Language] and [Video System] options in the (Set up) menu (p. 26) -White balance data recorded with the custom white balance function (p. 56) -Colors specified in the [Color Accent] (p. 61) or [Color Swap] (p. 62) modes. 27 -Newly added My Camera settings (p. 112) Formatting Memory Cards Formatting Memory Cards You should always format a new memory card or one from which you wish to erase all images and other data. • Please note that formatting (initializing) a memory card erases all data, including protected images and other file types. • When the icon is displayed, sound data recorded with the sound recorder exists. Exercise adequate caution before formatting the memory card. (Set up) Menu [Format]. 1 See Menus and Settings (p. 22). 2 Select [OK] and press . • To perform a low level format, press the Multi Controller to select [Low Level Format] and or to add a check mar...