


Оценок - 1, средний балл: 5
(
 )
)
)
|
Фото и характеристики Sony DVP-FX730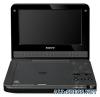 |


К этому устройству также есть другие инструкции:


Фрагмент инструкции
2 Press X/x to select the file, and press ENTER. Playback starts from the selected file. To go to the next or previous file Press > or .. To stop playback Press x. The display will return to the list of files. To pause playback (MP3 only) Press X. To restart playback, press X again. z If the number of viewing times is preset, you can play the DivX video files as many times as the preset number. The following occurrences will be counted as one time: – when x is pressed. – when the player is turned off (including standby mode). – when the disc lid is opened. – when another file is played. – when INPUT is pressed. – when the USB device is disconnected. b Depending on the file, playback may take time to start or may not be able to start. For details on playable files, see “Playable Media” (page 27). Selecting a JPEG file To rotate a JPEG image Press C/X/x/c while viewing the image file. Rotate every file. c: Rotates the image 90 degrees clockwise. C: Rotates the image 90 degrees counter clockwise. X: Reverses the image vertically (up and down). x: Reverses the image horizontally (left and right). Playback ,continued To display the list of thumbnails To display the list of thumbnails 1 2 3 4 5 6 7 8 9 10 Slide Show 11 12 Prev Next • To go to the previous or next list of thumbnails, select “bPrev” or “NextB” at the bottom of the screen, and press ENTER. • To exit the list of thumbnails, press MENU. Playing a Slide Show 1 While displaying the image file you want to start a slideshow, press MENU. The list of thumbnails appears. 2 Press C/X/x/c to select “Slide Show” at the bottom of the screen, and press ENTER. A slideshow starts from the displayed file. To stop slideshow Press x to return to the list of files. Press MENU to return to the list of thumbnails. To pause slideshow Press X. Playing data on a USB device You can playback DATA files on a USB device. 1 Press INPUT to select “USB.” 2 Connect a USB device to the USB jack. OPERATE OFF ON HOLD A PHONES B AUDIO VIDEO IN/OUT DC IN 9.5V INPUT DISPLAY MENU RETURN OPTION ENTER VOLUME INPUT USB device USB jack To disconnect a USB device 1 Press INPUT to deselect “USB.” 2 Disconnect the USB device. About supported Sony USB devices The following Sony USB Memory Stick reader/writer and USB flash drive “Micro Vault” are supported: MSAC-US40, USM-J series, USM-JX series, USM-J/B series, USM-L series, and USM-LX series. b • Do not disconnect the USB device while its access indicator is flashing. Doing so may cause data corruption or loss of data. • USB devices which can connect to the player are flash memory and multiple card readers. Other devices (digital still camera, USB hub, etc.) cannot be connected. When an unsupported device is connected, an error message appears. Adjusting the Picture Size and Quality Adjusting the Picture Size and Quality You can adjust the picture displayed on the LCD screen. INPUT DISPLAY MENU RETURN OPEN PUSH CLOSE OPTIONS ENTER VOLUME C/X/x/c ENTER OPTIONS RETURN 1 Press OPTIONS. The menu display appears. 2 Press X/x to select “LCD Mode” and press ENTER. The “LCD Mode” display appears. items • Hue: Adjust the red and green colour balance by pressing C/c. • Color: Adjust the richness of colours by pressing C/c. • Default: Return all settings to the factory defaults. 4 Press ENTER. * In “Normal,” pictures are displayed in their original configuration, retaining the aspect ratio. 4:3 pictures are displayed with black bands on both sides of the screen. 4:3 letter box pictures are displayed with bands on all sides of the screen. In “Full,” pictures are adjusted to fill the entire screen. 16:9 pictures are displayed in their original configuration. (Black band recorded in a 16:9 picture cannot be erased.) 4:3 pictures appear stretched. To turn off the menu display Press OPTIONS or RETURN twice. b Depending on the disc, the screen size you can select differs. Playback LCD Mode LCD Aspect FullBacklight 10 Contrast 10 Hue 0 Color 10 Default Select: ENTER RETURNCancel: 3 Press X/x to select items and press ENTER. • LCD Aspect: Change the picture size. Select “Normal” or “Full” by pressing X/x*. • Backlight: Adjust the brightness by pressing C/c. • Contrast: Adjust the difference between light and dark areas by pressing C/c. Settings and Adjustments Settings and Adjustments By using the setup display, you can make various settings to items such as picture and sound. Some discs have stored playback settings, which take priority. INPUT DISPLAY MENU RETURN OPEN PUSH CLOSE OPTIONS ENTER VOL UME C/X/x/c ENTER OPTIONS RETURN x 1 Press OPTIONS when the player is in stop mode. The menu display appears. During Resume Play, you cannot use the setup display. Press x twice to clear Resume Play, and press OPTIONS. 2 Press X/x to select “Setup,” and press ENTER. The setup display appears. setup category items OnPBC DivX Default General Setup TV Display Angle Mark 16 : 9 On OnScreen Saver Select: ENTER RETURNCancel: : General Setup (page 18) Makes the player-related s...