


Оценок - 3, средний балл: 3.3
(


 )
)
|
Фото и характеристики Makita 6826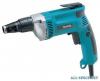 |


Фрагмент инструкции
If you use this tool unsafely or incorrectly, you can suffer serious personal injury. 1. Hold tool by insulated gripping surfaces 3. Hold the tool firmly. when performing an operation where the 4. Keep hands away from rotating parts. cutting tool may contact hidden wiring or its own cord. Contact with a “live” wire will 5. Do not touch the bit or the workpiece make exposed metal parts of the tool “live” immediately after operation: they may be and shock the operator. extremely hot and could burn your skin. 2. Always be sure you have a firm footing. Be sure no one is below when using the tool in high locations. SAVE THESE INSTRUCTIONS SAVE THESE INSTRUCTIONS WARNING: MISUSE or failure to follow the safety rules stated in this instruction manual may cause serious personal injury. SYMBOLS USD201-2 The followings show the symbols used for tool. V .......................volts n....................no load speed ° A ....................... amperes ....................Class II Construction Hz ..................... hertz .../min................revolutions or reciprocation per minute ................ alternating current FUNCTIONAL DESCRIPTION FUNCTIONAL DESCRIPTION 1. Locking sleeve A B 1 002621 1 1mm (3/64”) 1. Locator 002628 1 2 1. Switch trigger 2. Lock button CAUTION: • Always be sure that the tool is switched off and unplugged before adjusting or checking function on the tool. Depth adjustment The depth can be adjusted by turning the locking sleeve. Turn it in “A” direction for less depth and in “B” direction for more depth. One full turn of the locking sleeve equals 1.5 mm (1/16”) change in depth. Adjust the locking sleeve so that the distance between the tip of the locator and the screw head is approximately 1 mm (3/ 64”) as shown in the figure. Drive a trial screw into your material or a piece of duplicate material. If the depth is still not suitable for the screw, continue adjusting until you obtain the proper depth setting. Switch action CAUTION: • Before plugging in the tool, always check to see that the switch trigger actuates properly and returns to the “OFF” position when released. To start the tool, simply pull the switch trigger. Tool speed is increased by increasing pressure on the switch trigger. Release the switch trigger to stop. For continuous operation, pull the switch trigger and then push in the lock button. To stop the tool from the locked position, pull the switch trigger fully, then release it. NOTE: • Even with the switch on and motor running, the bit will not rotate until you fit the point of the bit in the screw head and apply forward pressure to engage the clutch. A A Hook 002635 1. Reversing switch lever A B 1 Reversing switch action This tool has a reversing switch to change the direction of rotation. Move the reversing switch lever to the position (A side) for clockwise rotation or the position (B side) for counterclockwise rotation. CAUTION: • Always check the direction of rotation before operation. • Use the reversing switch only after the tool comes to a complete stop. Changing the direction of rotation before the tool stops may damage the tool. 002644 Hook The hook is convenient for temporarily hanging the tool. When using the hook, pull it out in A direction and then push it in B direction to secure in place. When not using the hook, return it back to its initial position by following the above procedures in reverse. 002645 1 B ASSEMBLY ASSEMBLY CAUTION: • Always be sure that the tool is switched off and unplugged before carrying out any work on the tool. Installing or removing the bit 002654 To remove the magnetic socket bit, first pull the locator out of the locking sleeve. Then pull the magnetic socket bit. 1 2 1. Locator 2. Locking sleeve 1 2 1. Locator 2. Magnetic socket bit 002662 To install the magnetic socket bit, insert it into the tool as far as it will go. Then install the locator by pushing it firmly back onto the locking sleeve. OPERATION 002674 Fit the screw on the point of the bit and place the point of the screw on the surface of the workpiece to be fastened. Apply pressure to the tool and start it. Withdraw the tool as soon as the clutch cuts in. Then release the switch trigger. CAUTION: • When fitting the screw onto the point of the bit, be careful not to push in on the screw. If the screw is pushed in, the clutch will engage and the screw will rotate suddenly. This could damage a workpiece or cause an injury. • Make sure that the bit is inserted straight in the screw head, or the screw and/or bit may be damaged. MAINTENANCE MAINTENANCE CAUTION: • Always be sure that the tool is switched off and unplugged before attempting to perform inspection or maintenance. To maintain product SAFETY and RELIABILITY, repairs, carbon brush inspection and replacement, any other maintenance or adjustment should be performed by Makita Authorized or Factory Service Centers, always using Makita replacement parts. ACCESSORIES CAUTION: • These accessories or attachments are recommen...