


Оценок - 3, средний балл: 3.7
(

 )
)
|
Фото и характеристики Sony ICD-PX720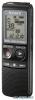 |


К этому устройству также есть другие инструкции:
Фрагмент инструкции
Recording with Other Equipment To audio input connector . PLAY/ STOP• ENTER . Tape recorder, etc. To .(headphone) jack Playback GB To record the sound of the IC recorder with other equipment, connect the .(headphone) jack of the IC recorder to the audio input connector (minijack, stereo) of other equipment using an audio connecting cable*. 1 Connect the .(headphone) jack of the IC recorder to the audio input connector (stereo minijack) of other equipment using an audio connecting cable*. 2 Press .PLAY/STOP•ENTER to start playback and at the same time set the connected equipment to the recording mode. A message from the IC recorder will be recorded on the equipment connected. 3 Press .(stop) on the IC recorder and the connected equipment at the same time to stop recording. * Optional audio connecting cables (not supplied) To the IC To the other recorder equipment RK-G139 Stereo Mini-plug mini-plug (monaural) RK-G136 Stereo Stereo mini-plug mini-plug Note . Your dealer may not handle some of the above listed optional accessories. Please ask the dealer for detailed information. .Tip Before you start recording, we recommend you to make trial recording first. GB Playing Back a Message at a Desired Time with an Alarm DISPLAY/ MENU . . PLAY/ STOP• –., ENTER .+ You can sound an alarm and start playback of a selected message at a desired time. You can have the message played back on a specified date, once every week, or at the same time every day. 1 Select the message you want to play back with an alarm. 2 Enter the alarm setting mode. . Press and hold DISPLAY/MENU to enter the menu mode. The menu mode window will be displayed. . Press –.or .+ to select “ALARM,” then press .PLAY/STOP•ENTER. (If the alarm has already set to the selected message, “ALARM ON” is displayed. If you do not wish to change the setting, press .(stop) and exit the menu mode.) .Note “ALARM OFF (or ON)” will not appear and the alarm cannot be set if the clock has not been set or no message has been recorded in the selected folder. Playback GB . Press –.or .+ to select “ON,” then press .PLAY/STOP•ENTER. 3 Set the alarm date and time. . Press –.or .+ to select “DATE,” a day of the week, or “DAILY,” then press .PLAY/STOP•ENTER. . When you select “DATE”: Set the year, month, day, hour, and minute in sequence, as described in “Step 2: Setting the Clock” on page 15, then press .PLAY/STOP•ENTER. When you select a day of the week or “DAILY”: Press –.or .+ to set the hour, then press .PLAY/STOP•ENTER, press –.or .+ to set the minute, then press .PLAY/ STOP•ENTER. 4 Press –.or .+ to select the alarm sound either from “B-ONLY” or “B-PLAY,” then press .PLAY/ STOP•ENTER. B-ONLY: Only the alarm will sound. B-PLAY: The selected message will be played back after the alarm. “ALARM ON” will be displayed. 5 Press .(stop) to exit the menu mode. The setting process is finished and “.” (alarm indicator) appears in the display window. GB When the set date and time comes At the set time, the alarm will sound for about 10 seconds and the selected message will be played back. (If you have selected “B-ONLY,” only the alarm will sound.) During playback, “ALARM” will flash in the display window. When the playback ends, the IC recorder will stop automatically at the beginning of that message. To listen to the same message again Press .PLAY/STOP•ENTER, and the same message will be played back from the beginning. To stop the alarm before the playback starts Press .(stop) while the alarm sound is heard. You can stop the alarm playback even when the HOLD function is activated. To change the alarm setting Start from step 2 on page 45. To cancel the alarm setting Follow steps 1 and 2-. on page 46. In step 2-., press –.or .+ to select “OFF,” and press .PLAY/STOP•ENTER. The alarm will be cancelled, and the alarm indicator will disappear from the display window. Playback GB .Notes . . . . . . . . . When the clock has not been set or no messages are recorded, you cannot set the alarm. The alarm sounds even if you set “BEEP” to “OFF” in the menu (page 64). If you try to set the alarm to play back a message at a previously set time on another message, “PRE SET” will be displayed, preventing new settings. If the alarm time comes while another message is being played back with an alarm, the playback stops and the new message will be played back. If the alarm time comes during recording, alarm will sound for 10 seconds after the recording is finished and playback begins. “.” will flash when the alarm time comes. If more than one alarm time comes during recording, only the first message will be played back. If you delete a message on which you have set an alarm, that alarm will be also cancelled. If the alarm time comes during erasing operation, alarm will sound for 10 seconds after the erasing is finished and playback begins. If the alarm time comes while you are updating the data, the alarm setting will be cancelled automatically. GB Editing Messages Erasing Messages You can erase the rec...