


Оценок - 4, средний балл: 3.8
(

 )
)
|
Фото и характеристики Samsung HT-E6750W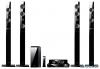 |


К этому устройству также есть другие инструкции:


Фрагмент инструкции
English 31 | 04 Settings Security The default PIN is 0000. Enter the default PIN to access the security function if you haven't created your own password. . BD Parental Rating: Prevents playback of Blu-ray Discs with a rating equal to or above a specific age rating you enter unless the PIN is entered. . DVD Parental Rating: Prevents playback of DVDs with a rating above a specific numerical rating you select unless the PIN is entered. . Change PIN: Change the 4-digit PIN used to access security functions. . If you forget your PIN 1 . Remove any disc or USB storage device. 2 . Press and hold the 5 button on the front panel for 5 seconds or more. All settings will revert to the factory settings. | NOTE | When the factory default settings are restored, all the user stored BD data will be deleted. General You can specify the display brightness and time zone. . Front Display: Lets you change the brightness of the front panel. . Time Zone: You can specify the time zone that is applicable to your area. . Menu Transparency: Adjust the transparency of the menu box. DivX® Video On Demand View DivX® VOD Registration Codes to purchase and play DivX® VOD contents. Support Software Update For more information about the Software Update function, see "Upgrading Software" on page 37. Contact Samsung Provides contact information for assistance with your product. Remote Management When activated, lets Samsung Call Centre agents diagnose and fix problems with the product remotely. Requires an active Internet connection. Remote Management service might not be available in some countries. Reset All settings will revert to the default except for the network and Smart Hub settings. The default security password is 0000. ............................................................................................................ ............................................................................................ | 32 English Settings Auto Sound Calibration By setting the Auto Sound Calibration (ASC) function just once when you relocate or install the product, you can have the product automatically recognize the distance between speakers, levels between channels, and frequency characteristics to create a 7.1-channel sound field optimized for your environment. 5V 500mA ASC IN ASC microphone Auto Sound Calibration Mode You will hear either the Auto Sound Calibration mode or the User Speaker Settings. • Off: You will hear sound in the Speaker Setting value. • On: You will hear sound in the Auto Sound Calibration mode. Measurement You will hear either the Auto Sound Calibration mode or the User Speaker Settings. 1 . Plug the ASC microphone into the ASC IN jack. 2 . Place the ASC microphone at the listening position. • Auto Sound Calibration will be automatically set up in the following sequence: Front L . Front R . Centre . Surround L . Surround R . Front Top L . Front Top R . Subwoofer • Press the RETURN (') button to cancel the Auto Sound Calibration Setting. Networks and the Internet When you connect this product to a network, you can use network based applications and functions such as Smart Hub and BD-LIVE, and upgrade the product's software through the network connection. For more information about accessing and using Internet services, see the Network Services chapter of this manual on pages 55~57. Instructions for configuring the network connection start below. Configuring Your Network Connection Before you begin, contact your ISP to find out if your IP address is static or dynamic. If it is dynamic, and you have a wired or wireless network, we recommend using the Automatic configuration procedures described below. If you are connecting to a wired network, connect the product to your router using a LAN cable before you start the configuration procedure. If you are connecting to a wireless network, disconnect any wired network connection before you begin. To begin configuring your network connection, follow these steps: 1 . In the Home screen, select Settings, and then press the E button. 2 . Select Network, and then press the E button. 3 . Select Network Settings, and then press the E button. 4 . Go to the instructions for Wired networks starting below or the instructions for Wireless networks starting on page 33. Wired Network Wired – Automatic After following Steps 1 to 3 above: 1 . Select Start in the Network Settings screen, and then press the E button. The product detects the wired connection, verifies the network connection and then connects to the network. ............................................................................................................ ............................................................................................ English 33 | 04 Settings Wired - Manual If you have a static IP address or the Automatic procedure does not work, you'll need to set the Network Settings values manually. After following Steps 1 to 3 above: 1 . Select Start in the Network Settings screen, and the...
Эта инструкция также подходит к моделям:Blu-Ray проигрыватели - HT-E6730W (8.94 mb)
Blu-Ray проигрыватели - HT-ES6200 (8.94 mb)